Overview
You can use our localization tools to enable multiple languages for your customers and agents. Each user can specify their preferred language, which will determine the language Kayako displays. In addition, you can supply translations for your self-service content – as well as custom field names and descriptions – for any languages you have enabled.
Diagnosis
When you're communicating with customers around the world, it's important to be able to deliver a support experience that's tailored to their language preferences. That's where Kayako's localization features come in.
Your Kayako Help Center is now available in 44 languages, which you can enable and offer to your customers. We'll be releasing full agent area translations for other languages soon.
Understanding How Localization Works in Kayako
Offering multi-lingual support in Kayako involves a few different steps and systems:
-
An administrator enables languages. From the admin area, you can enable or disable as many languages as you like.
-
Users – both agents & customers – can choose the default language. Users will be able to set any enabled language as their default. This tells Kayako which language to use for the Help Center interface, as well as the agent and admin areas.
NOTE: Although Kayako doesn't have full interface translations for every language, we're expanding the list of languages we support all the time.
-
Agents add translations for Help Center articles and custom fields. For any language you've enabled, you can round out your localization by supplying translations for your Help Center articles as well as translated field names and descriptions for any custom fields you've added. Customers will see any translated you provide for their default language.
Now that we've looked at how localization comes together let's go step-by-step through setting up multi-lingual support. Your first step to providing multi-lingual support is to enable one or more additional languages, which you can do from the admin area.
Prerequisite
- To enable and disable languages in Kayako, you will need an administrator account with the 'Manage localization' permission.
Solution
To enable a new language:
-
Sign in to the admin area.
-
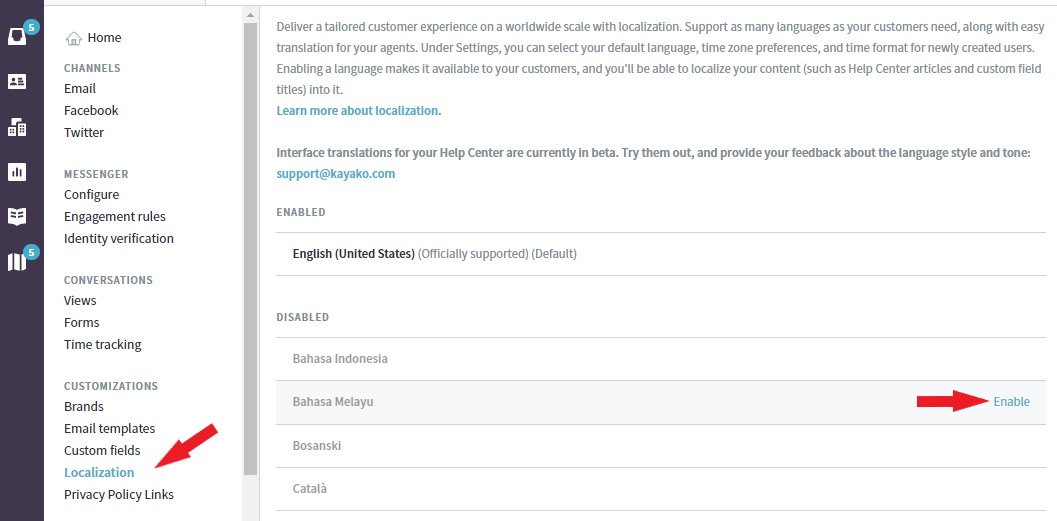
Click Localization on the sidebar.
-
Hover over the language you want, and click the Enable link that appears.
-
You'll see the language jump up to the 'Enabled' list at the top.

NOTE: If you need to remove one of your enabled languages, you can do so by hovering over the language and clicking the Disable link next to it.
Confirmation
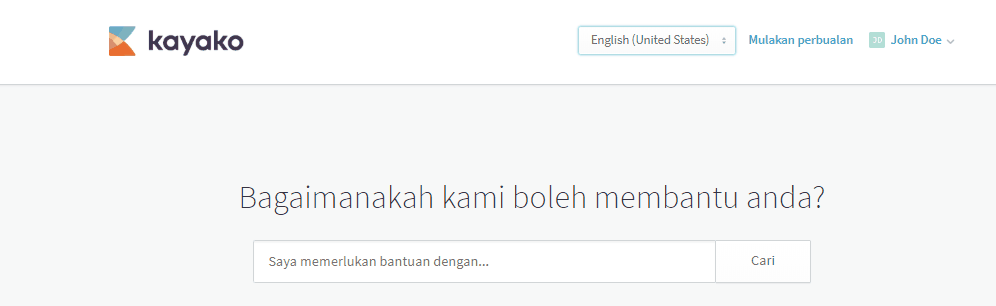
Now the language you enabled will appear as an option when your users are selecting their preferred languages.
As an example, when someone visits your Help Center, the language you enabled will be available from the language drop-down menu for users to select as their preferred language.
ATLAS
Comments