Overview
Kayako's localization features let you host Help Center content in as many different languages as you provide translations for. You'll add translated content in the same way you would for your default language. The article covers the process to add translations for the Help Center content.
Prerequisite
- To add translated Help Center content in Kayako, you will need at least an agent account with the 'Manage the Help Center' permission.
Solution
To add translated versions of your Help Center content:
-
Sign in to the Help Center.
-
Go to the category, section, or article you want to translate.
NOTE: For this exercise, let's say we are adding a translation for an article. -
Open the article for editing by clicking the Edit article button.
-
Click the language selector that appears in the upper-left.
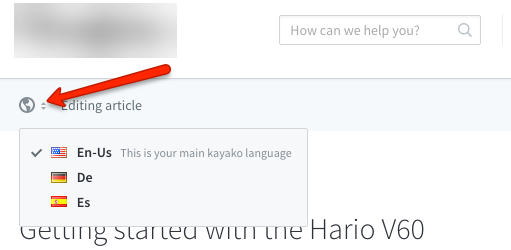
-
Choose the language from the dropdown menu.
-
Add the translated content or title to the main article text and title boxes.
NOTES:-
You must have content for your default language before you can save any translated versions. For example, if you are translating an article say to Spanish, and if your default language is English, then you must save the content and the title in English first before you can add the Spanish translations.
-
-
Click the Save or Update button to save and publish your translation.
Testing
- Go to your Help Center and open the article you translated.
- Select the language from the dropdown to see your translated content.

ATLAS
Comments