Overview
Before you can start using the messenger feature, you need to enable it by configuring the settings in the admin panel. It's worth noting that if you are supporting multiple brands, the brand you are associating the messenger with needs to have an email address associated with it. Else, you will not be able to post public replies to conversations created under the brand, only private or internal notes.
Prerequisites
- To edit the messenger configuration, you will need an administrator account with the 'Manage channels' permission.
Solution
Kayako Messenger makes it easy for you to deliver a great real-time support experience. With Messenger enabled, the end-user can visit your Help Center, website, or app, click the Messenger icon, and start interacting with your support team immediately. However, you need to configure it first before you can start using the messenger feature.
As mentioned above, if you are supporting multiple brands, you need to make sure the brand you are associating with this messenger has an email address associated with it. Else, you will not be able to support your customers who are submitting conversations through the brand's Help Center form or when using the live messenger chat feature. Agents will only be able to post internal or private notes to those conversations.
During the configuration process, you may customize the messenger and decide how it will appear to the end-users by editing the welcome text, setting a color scheme, and selecting what information you want to include on Messenger's home screen.
To add Messenger to an external site or app, Kayako generates a customized embed code that can be used to embed the messenger in a site or an app.
To customize and enable Messenger, follow the steps listed below:
-
Sign in and navigate to the admin area.
-
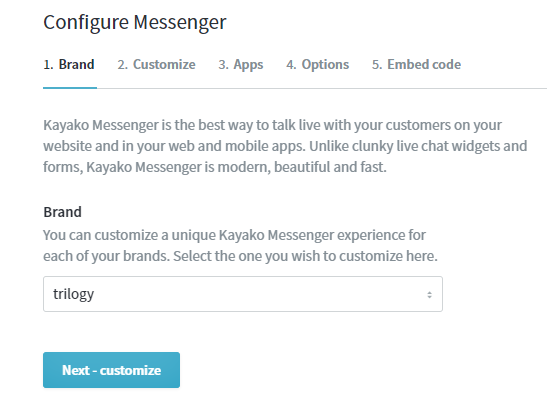
Click Configure, under the Messenger heading in the sidebar.
-
If you are using multiple brands, select a Brand for this Messenger configuration, and click the Next - customize button.
NOTE: If you only have a single brand, you won't see this tab. It goes straight to the Customize tab.
-
In the Customize tab, set your text for the Home screen title, which appears at the top of the window (see next screenshot below). You'll be able to see how your changes will look in the preview to the right.
-
Next, add some Home Screen welcome text to appear below the greeting. (see next screenshot below)
Note: If you are using multiple languages for messenger and you customize your Messenger greeting or welcome text, you'll need to provide your translations using the localization menu. Otherwise, your greeting will appear in your default language regardless of what languages your customer selects.

-
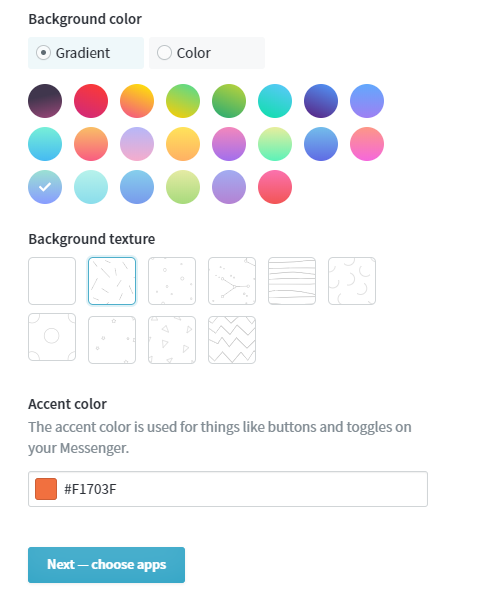
Still, under the Customize tab, choose a color or gradient to bring the Messenger in line with the branding. You can select a Background texture as well. (see next screenshot below)
-
In the Accent color section, click the color swatch and choose a color for the Messenger button and headings. You may also enter the hex code of the color you want to use. (see next screenshot below)
Hint: If you go out to the Help Center and open the Customize panel, you can copy and paste the code for the primary color you use there.
-
Hit the Next - choose apps button to head to the Apps tab.
-
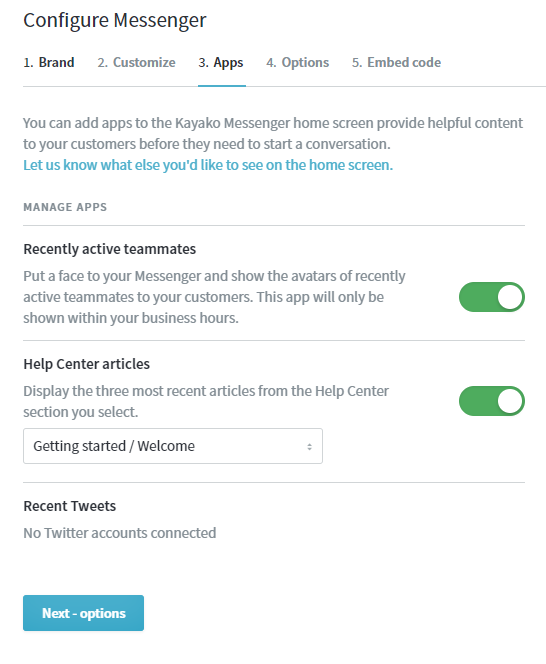
In the Apps tab, you can pick a few different apps for the Messenger home screen:
-
Recently active teammates
Displays avatars and names for agents who have lately been online -
Help Center articles
Shows the three most recent articles from whichever section you choose -
Recent tweets
Displays the latest tweets from a connected Twitter account
-
-
After selecting the apps, hit the Next - options button.
-
In the Options tab, select a set of Business Hours for Messenger.

-
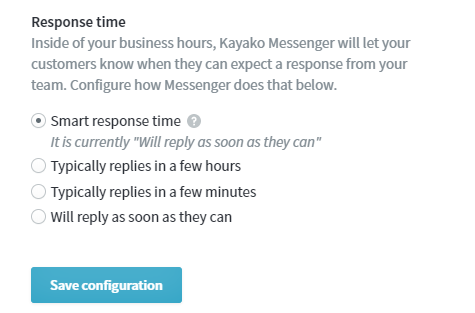
After Business Hours, in the Response time section, you should add the expectation you want Messenger to set with the end-users.
Note: The response time message will only be displayed within business hours.
-
Click the Save configuration button; this will update Messenger on your Help Center.
Note: If you ever need to turn Messenger on/off for your Help Center, or you want to restrict Messenger by the time of day, or by whether or not a user is logged in, visit the Restricting Messenger Display on Help Center article.
-
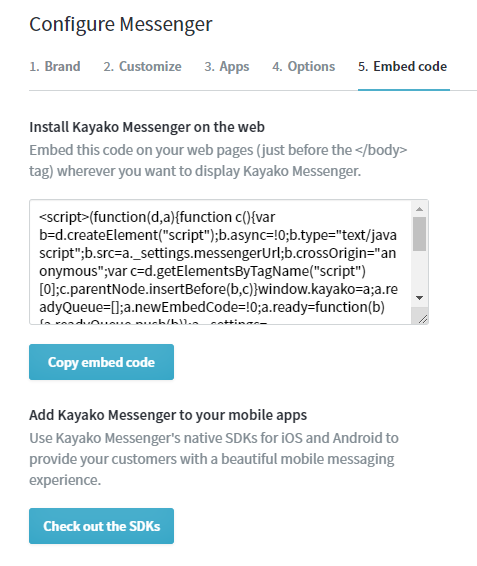
If you want to publish the messenger on your third-party website or app, on the Embed Code tab, you can select everything in the Embed code box and copy or click the Copy embed code button, and paste it into your website or app code. It should be added right before the </body> tag, wherever you want Messenger to appear.
-
To explore your options for adding Messenger to a mobile app, click the Check out the SDKs button.
At any point, you can come back to the admin area and update Messenger configuration. Clicking the Save Configuration button on the Options tab will automatically update Messenger wherever it is published.
The messenger will show the default icon (bubble launcher with 3 dots) but if you wish to customize it, go to the Customizing the Kayako Messenger Widget article for more information.
Testing
Once you saved the configuration, follow these steps:
- Go to your Help Center, or to the website or app where you published it, and you should be able to see the messenger bubble launcher as shown below.
- Click the launcher icon and try sending a test chat. If a user it no yet log in to the Help Center, it will ask for an email address.
- Go to the Agent Area and check your inbox. Look for the chat that was converted to a conversation.
- Open the conversation and try responding to it while in the Agent area. The response will appear in the chat window.
ATLAS
Comments