Overview
Conversation statuses typically map to your workflow and how you handle customer requests and conversations. Throughout its life, a conversation will move through various statuses. By default, the conversation status field (one of the system fields) is not visible to customers (end-users) in the Help Center when they view their conversations. This feature can be enabled if desired. Or, you can use custom fields and triggers as an alternative option.
Prerequisite
- To add custom fields in Kayako, you will need an administrator account with the 'Manage conversation fields' permission.
- To add triggers in Kayako, you will need an administrator account with the 'Manage automations' permission.
Diagnosis
The reason why the conversation status field is not visible to customers (end-users) by default is that it's not for customers to manipulate; they are for the agents to better control the conversation from a business standpoint. For example, you may have activated SLA timers for specific statuses, and statuses such as the On Hold or Pending will pause SLAs; if customers have control over this, they can break SLAs and could seriously impact how you manage your support team.
The only direct control that customers have over statuses is when they update a conversation; it will automatically move the status to Open.
In case you want customers to be able to change a conversation status, you have two options:
- Allow them to see and control the Status field by enabling the option in the Admin panel. Again, this comes with a risk as explained above so this is not the recommended solution. However, if you want to make this change, please visit Making a Field Visible and Editable to Customers. The options that you would want to enable are:
- Customers can see this field
- Customers can edit this field
- The recommended solution is to use Custom Status Fields and Triggers. The custom fields will appear in your Help Center, and if the customer changes it, the conversation status can be changed using the trigger. This custom status field will not impact your SLA timers as it is not tied to any of it.
Solution
To create a custom field and trigger, please follow these steps:
- Log in to Kayako as an Administrator.
- Go to Agent area > Administration.
- Click Custom fields under CUSTOMIZATIONS.
- Create a new custom field by clicking the New field button. (make sure you are in the Conversation fields tab)

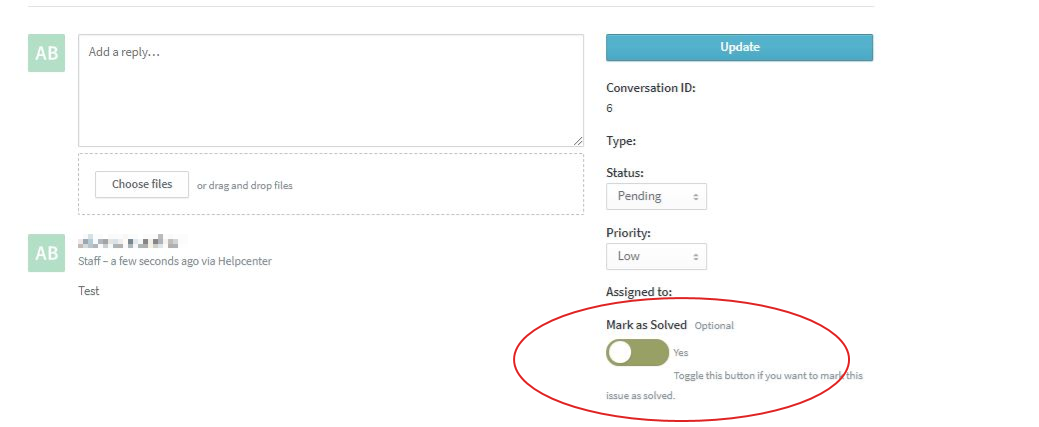
- Choose the type of field you want to use. We recommend choosing the Yes/No toggle option to avoid discrepancies in their input.
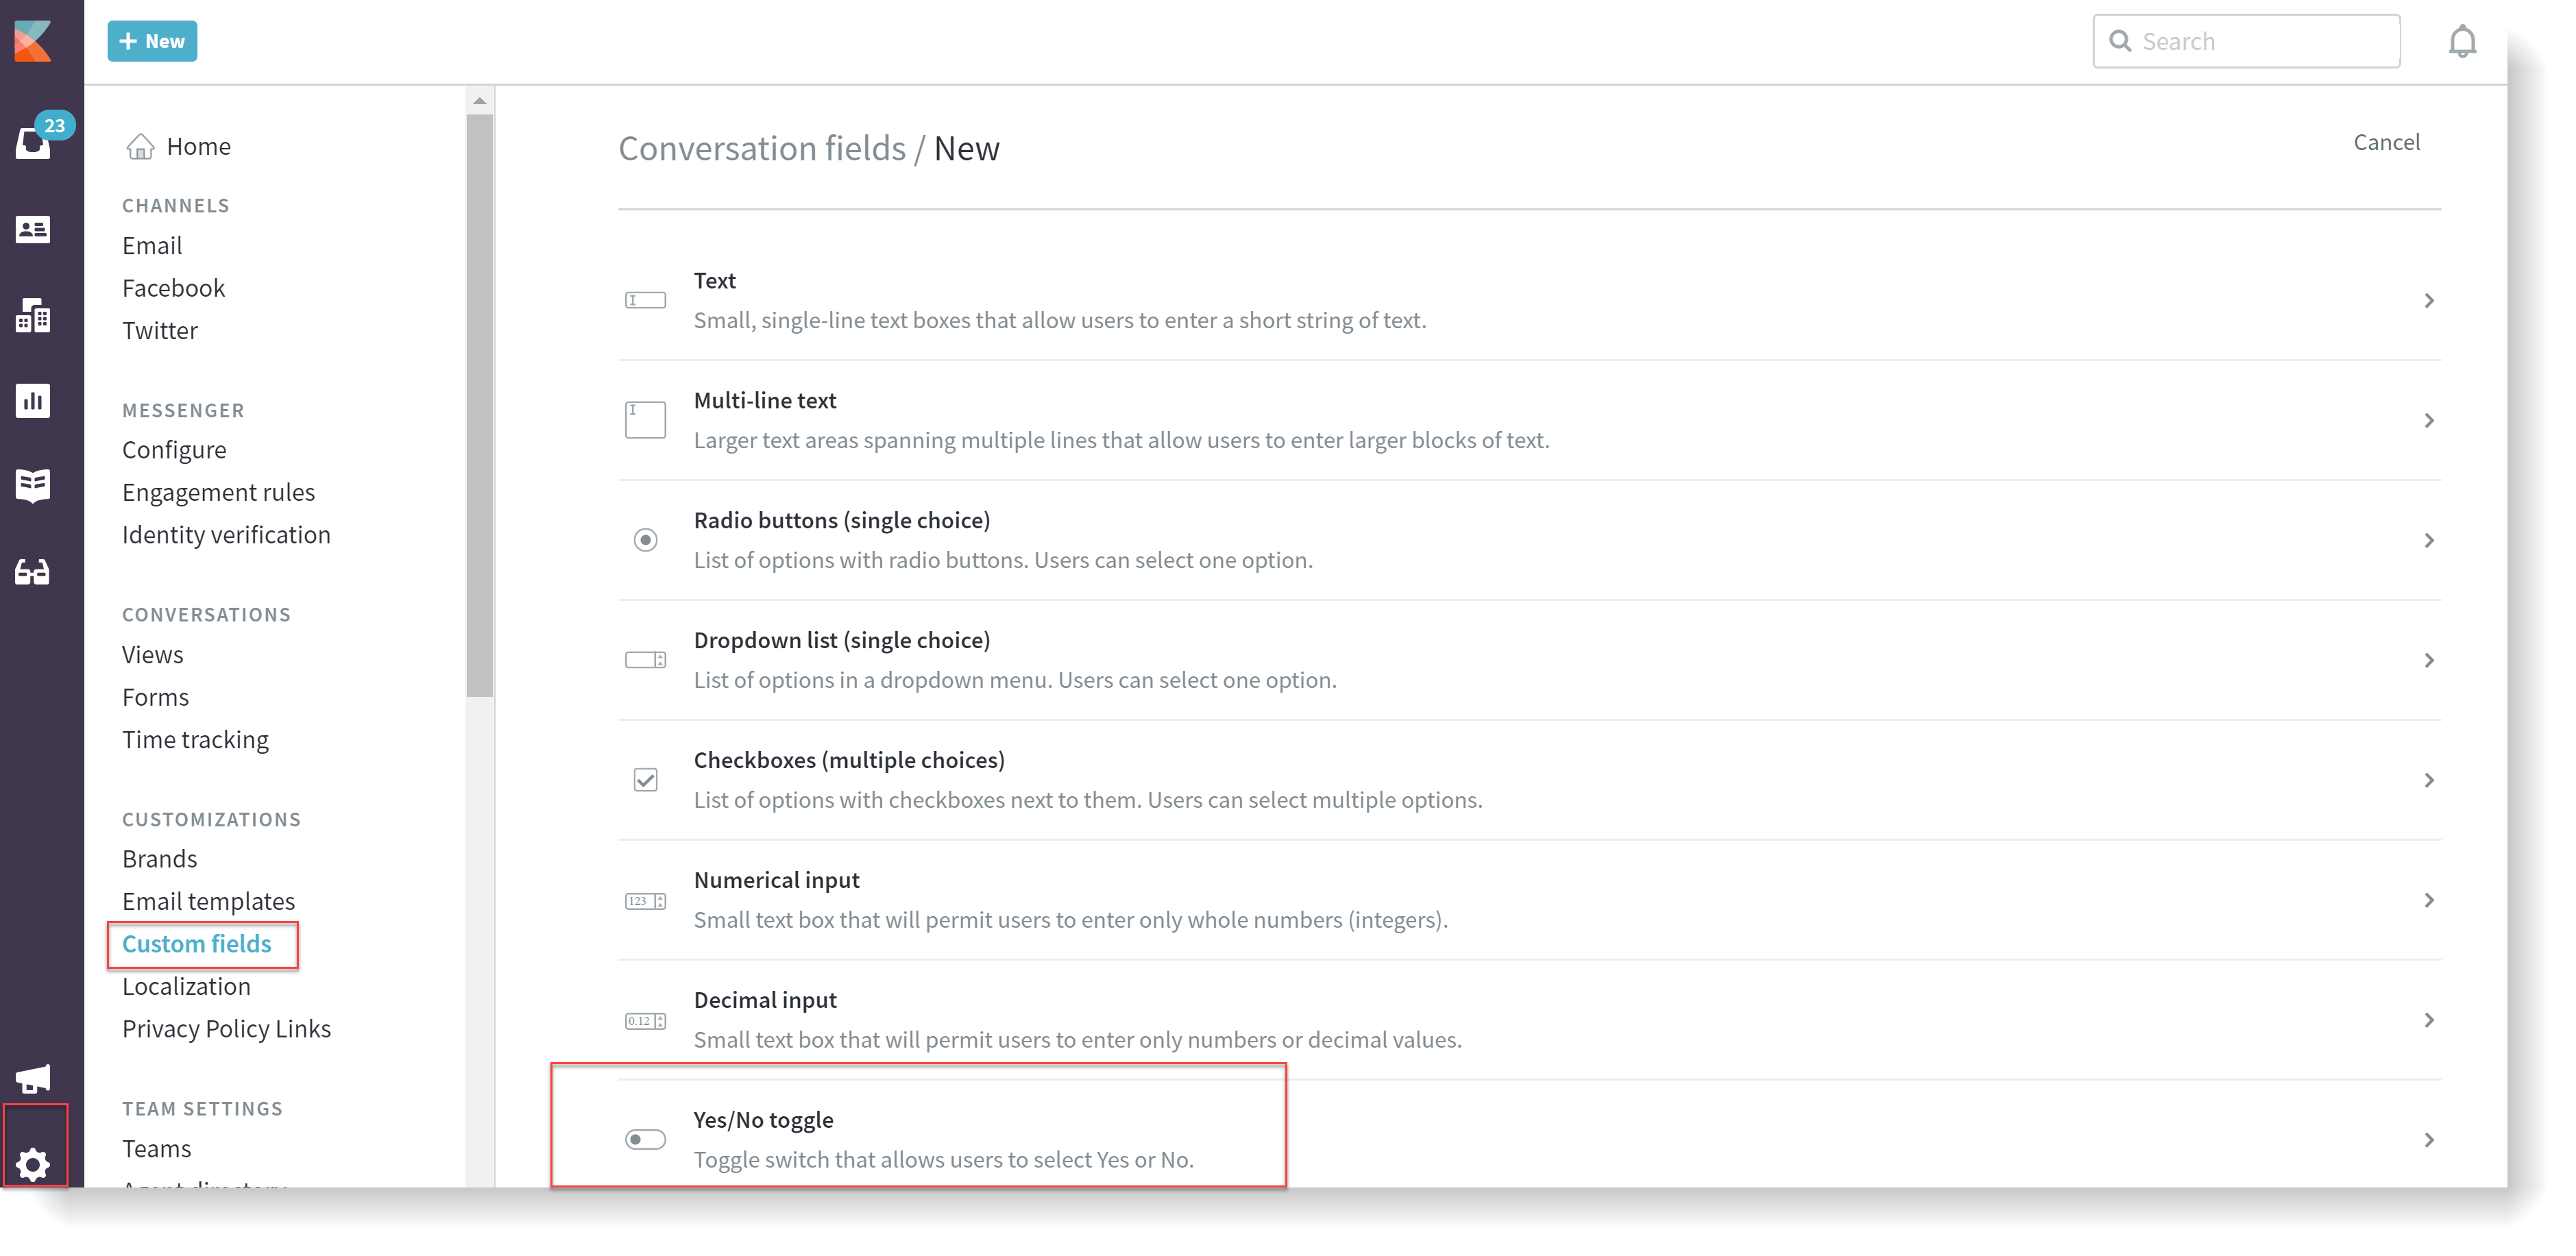
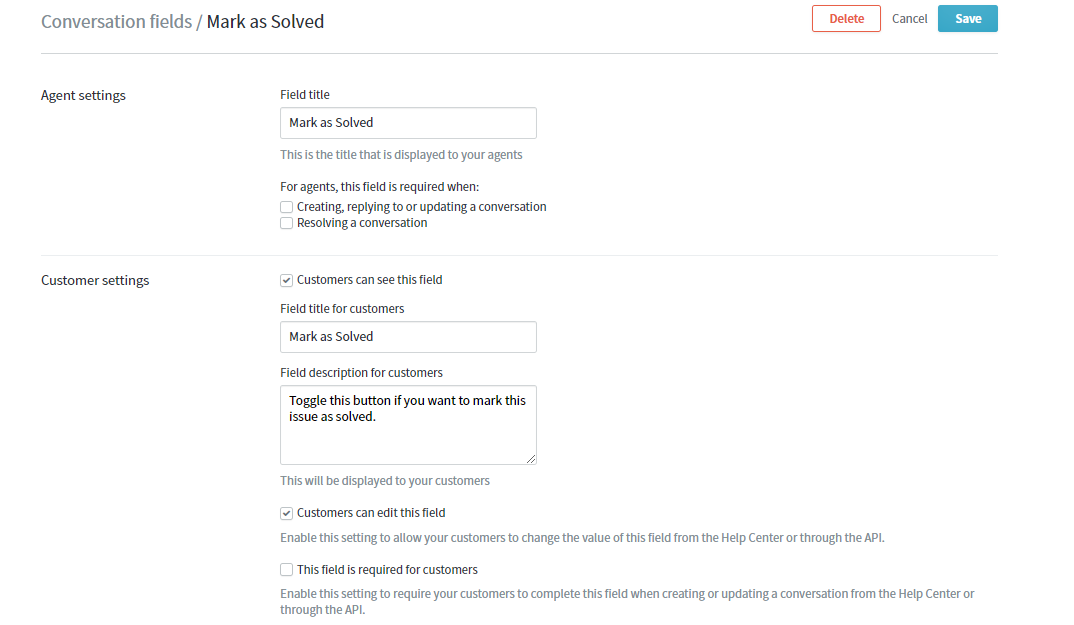
- Enter a Field title (e.g., Marked as Solved) and check the Customers can see this field and Customers can edit this field boxes to make it available for them. Enter a field title for customers and description. Then, click the Save button to save the new field.
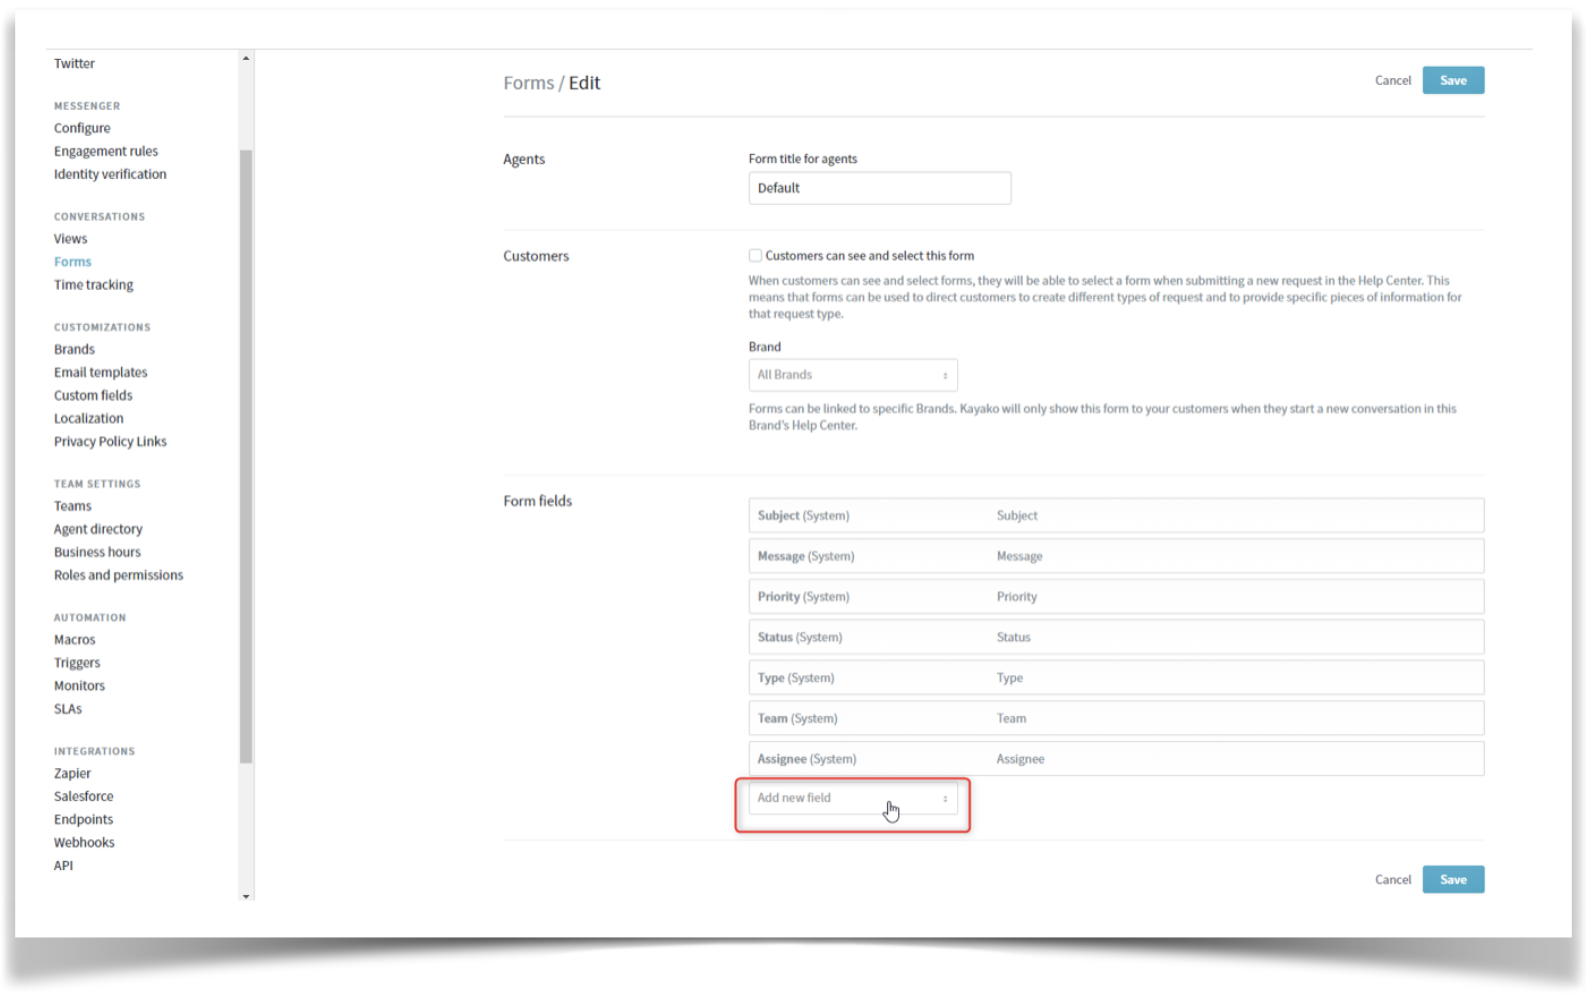
- The newly added custom field is automatically added to the default form in Kayako. However, if you built custom forms, then you need to add it to those forms. To add the field to a form, navigate to Conversations > Forms, select the form where you want to add the newly added custom field. Click the Add new field menu and select the field you want to add. Click Save when done.
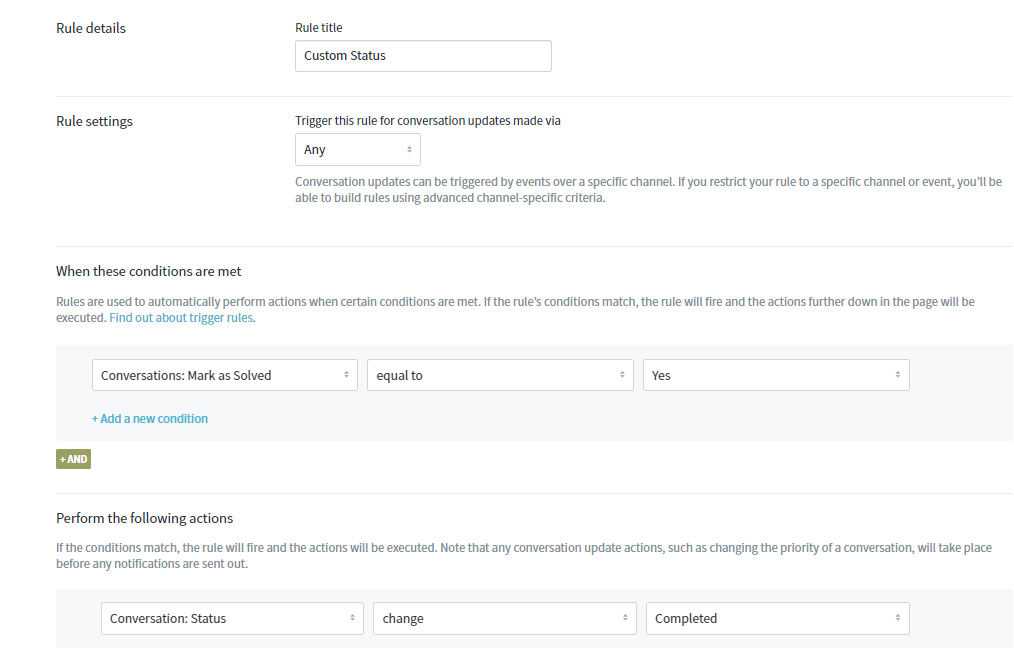
- Once you have the custom field added to the desired forms, create a new Trigger with the same conditions as shown in the image below:
Confirmation
The field will be visible in the Help Center cases, and when customers select Yes for Mark as Solved, the trigger will change the status of the conversation to Complete.
ATLAS
Comments