Overview
Re-ordering or rearranging the fields in the conversation submission forms is a common question we get from customers. Or, if a certain field is not showing up on the form, you may need to add that field to the form. Then, if you want to make that field visible to customers, edit the field settings to make it visible or editable to customers.
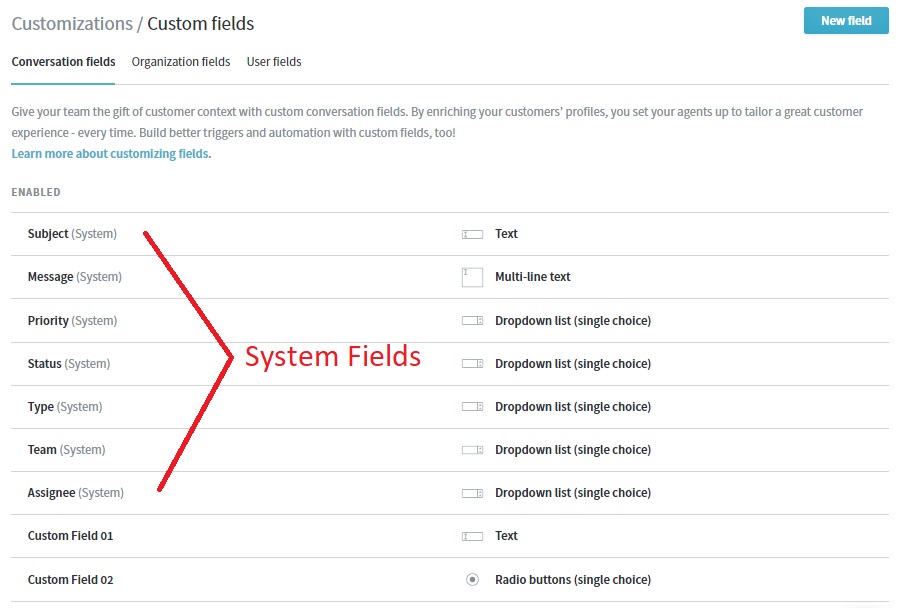
Kayako gives you lots of flexibility for how you collect information by providing a dozen different field types. Each one is designed to capture information in a different format. Organizing the placement of each field in your Help Center can give ease and convenience to your end-users when filling out the form.
NOTES:
- Only the fields which you allowed your customers to see or edit will be visible in the form in your Help Center.
- System or default fields cannot be disabled or removed but orders can be rearranged.
To see the table that explains the different field types and how to create one, please visit the Adding Custom Fields article. Once you have created your custom fields, you can go back to the admin area to rearrange them by the order that you want.
Prerequisite
- To add or manage custom fields in Kayako, you will need an administrator account with either the 'Manage conversation fields' or 'Manage custom user and organization fields' permissions, depending on the type of field you're creating.
Solution
To re-order the fields in a form or add a new field to the form, please follow these steps:
- Sign in to Kayako and go to the admin area.
- Under the 'CONVERSATIONS' heading, click the Forms link.
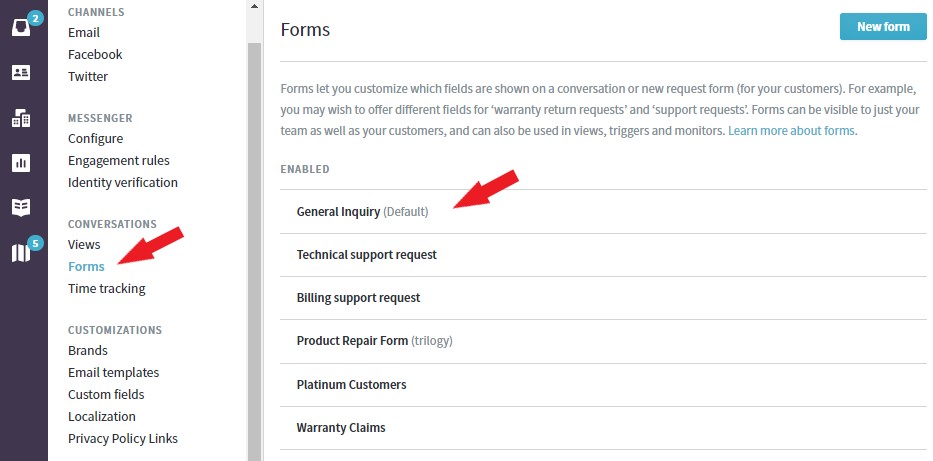
- Scroll down to the Forms fields section.
- Hover over the field you want to move and simply drag and drop it to the desired order.
- If you want to add new fields, click the Add new field dropdown to see a list of additional fields. Select the field you want to add.
- To remove a field, hover over the field and click 'Remove from form'.
- Click the Save button to save your changes.
Confirmation
The fields will show up in the Help Center submission form in the order you have arranged them. If you remove a field, it will no longer show up in the form. Likewise, if you added new fields, you will see them in the submission form.
ATLAS
Comments