Overview
Adding an article with a file attachment to the Help Center can also be done using the API. This article provides instructions on how to do so.
Prerequisite
- To add an article to the Help Center using API, you need an agent, collaborator, or admin user account.
- Skills and knowledge of API (Application Programming Interface) call and API tool or client (e.g., Postman).
Solution
There are three parts to this solution. First, you need to get the session IDs and X-CSRF token. Then, you need to upload the file. Finally, create the article with the attachment on it.
NOTE: The following steps were performed using Postman.
- Launch your API tool or client (e.g., Postman).
-
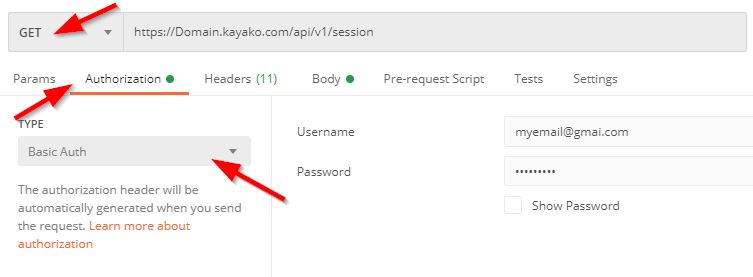
On the Authorization tab, select Basic Auth and add your Kayako credentials.
NOTES:- Specify your Kayako email address and password in the Username and Password text fields.
- If the user account you are using has two-factor authentication enabled, you need to disable it.
-
Select the GET method from the drop-down.
-
Write the URL using this pattern:
https://DOMAIN.kayako.com/api/v1/session- Replace
DOMAINin the above URL with your Kayako domain.
- Replace
-
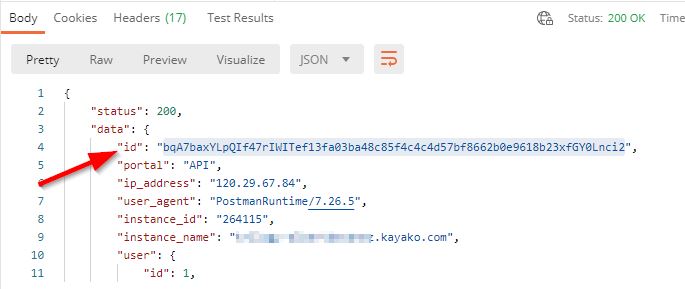
Press Send.
- From the response Body, copy the session ID and save it.
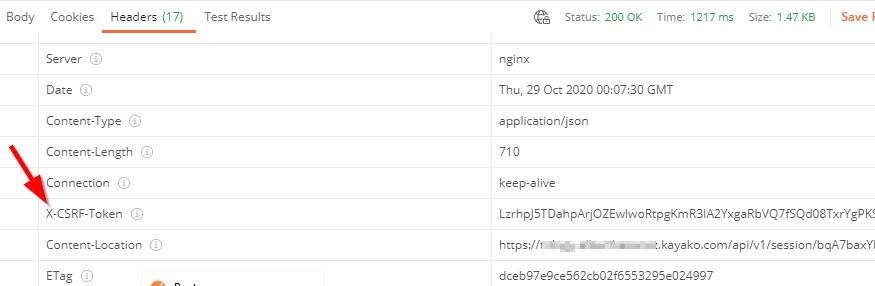
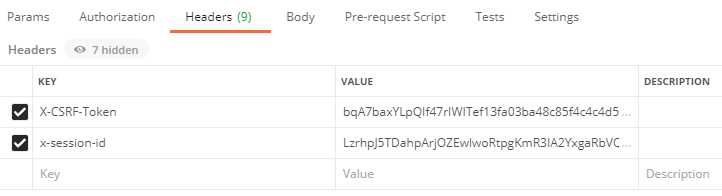
- From the Headers tab, copy the X-CSRF token and save it.
NOTE: Once you have the information saved, let's move to upload the files. -
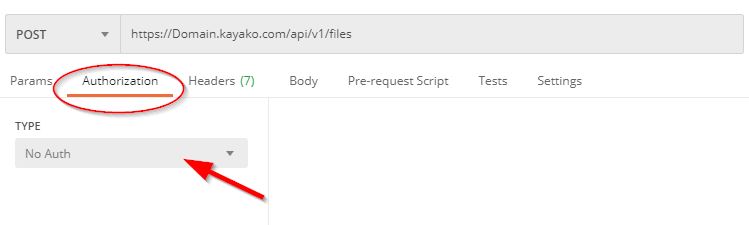
Select the POST method from the drop-down and type the URL using this pattern:
https://DOMAIN.kayako.com/api/v1/files- Replace
DOMAINin the above URL with your Kayako domain.
- Replace
- This time, you need to select No Auth from the Authorization tab.
- Go to the Headers tab and add the session ID and X-CSRF token you copied from steps 6 and 7 above respectively.
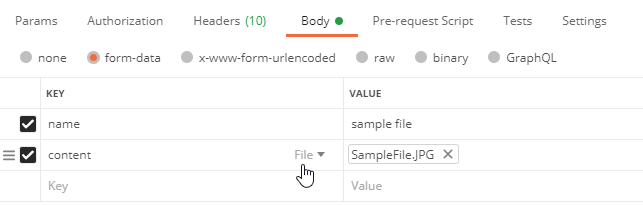
- Go to the Body tab and add the following values (name and content). Note that "name" is text while "content" is a file type.
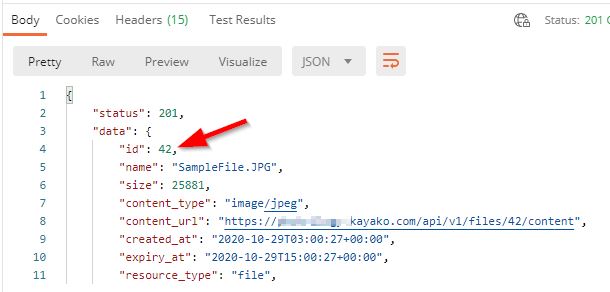
- The above action will return a response that contains the "file ID". Copy the file ID (in the example below, the ID is 42) and save it.
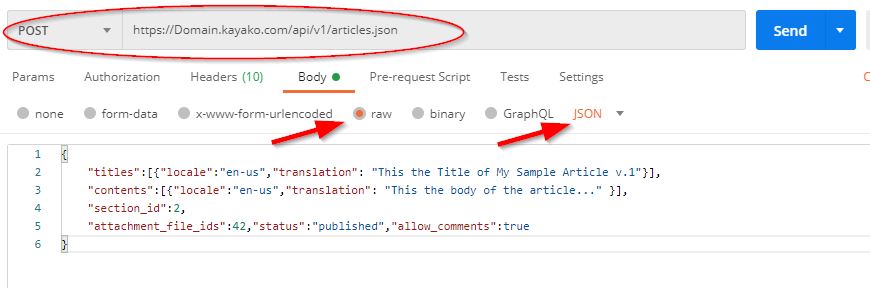
- The final step is to add the article with the attachment. Select the POST method from the drop-down and type the URL using this pattern:
https://DOMAIN.kayako.com/api/v1/articles.json- Replace
DOMAINin the above URL with your Kayako domain.
- Replace
- Same as the previous call, select No Auth from the Authorization tab. Then add the session ID and X-CSRF token you copied from steps 6 and 7 above respectively in the Headers tab.
- In the Body, select "raw" and "JSON" as type. Then, enter the required information such as the following:
- Titles - contains the title of your article.
- Contents - contain the body of the article.
- Section_ID - Contains the ID of the section where you want to place the article. (see How to Obtain Help Center Section IDs below)
- Attachment_file_IDs - Contains the file ID you got from step 12 above.
NOTE: Multiple attachments can be added by listing them as comma-separated values, e.g. ID1, ID2, ID3, etc. - Status - The status of the article (published or draft)
- Allow_comments - whether you want readers to allow comments or not
How to Obtain Help Center Section IDs
To get the section IDs of the sections where you want the articles to reside:
- You could obtain this information by navigating to the section in your the Help Center, by checking the number right after "/section/". In the example below, the section ID is 1.

- You can also obtain this information via the API using the following query string (Replace DOMAIN with your actual Kayako instance domain):
GEThttps://DOMAIN.kayako.com/api/v1/sections.json?fields=titles&include=*&category_ids=INSERT_CATEGORY_IDS_SEPARATED_BY_COMMA
To learn more about managing or retrieving data from the Help Center using API, please visit this article.
Confirmation
There are two ways to verify if the call was successful. One way is to check the status code in the response which should show "Status: 201 Created".

Another way to verify if the article was created successfully is to simply go to the Help Center and navigate to the section where you added the article.

ATLAS
Comments