Overview
At times, you may want to see the activities of user accounts registered in your instance for either monitoring purposes or if you want to check sign-in logs due to a suspected security breach.
There are several ways you can retrieve activity logs as well as sign-in logs of users in Kayako. You can either use the Kayako UI or the API to retrieve these pieces of information.
Prerequisite
- To retrieve the user activities data through the Kayako UI or using API, you will need a staff user account (agent, collaborator, or admin).
- Skills and knowledge of API (Application Programming Interface) calls.
Solution
Retrieving User Activity Logs Through the Kayako UI:
- Log in to Kayako.
- Search for the user and open the user profile.
NOTE: Use the search function to look for a user's profile or go to https://domain.kayako.com/agent/users to search from the Users widget. Just change the "domain" with your actual domain name. Or you can search from the Users widget by clicking the icon on the left-hand panel.
-
From there, you can review the user's log and see when the user has signed in and what changes the user made in Kayako.
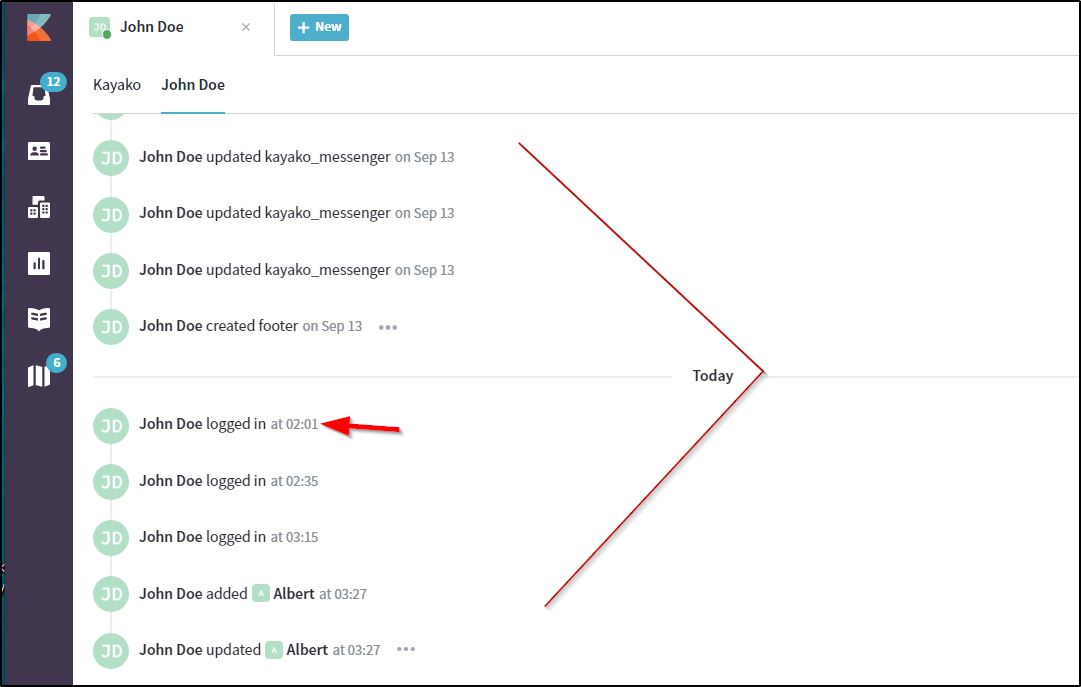
While in Kayako, you can also retrieve the list of users who logged in on a particular time or period.
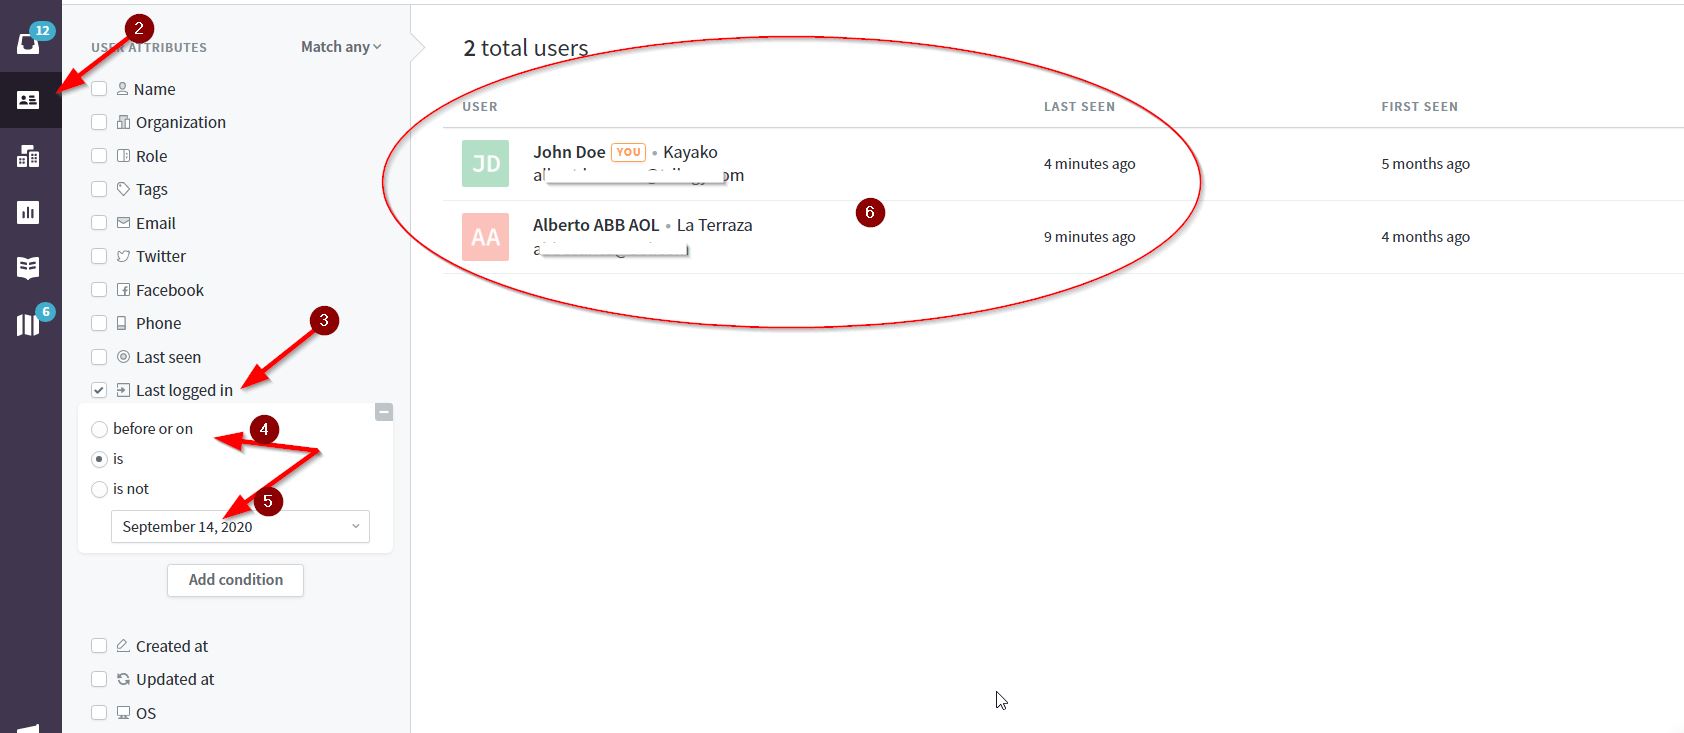
- Click the User widget/icon on the left-hand panel.
- Use the 'Last logged in' filter by checking the box next to it.
- Set the condition by selecting the corresponding radio button.
- Select the date from the pop-up calendar or set the time window as desired.
- Review the result on the right-hand panel.
Should you need a more detailed report of a user's activity in Kayako, you may use the API to retrieve these pieces of information. If you pull a report through the API, it will contain information such as the type of activity the user performed, date and time, and the IP address used.
Retrieving User's Activity Logs Through the API
NOTE: The following procedure assumes that you have knowledge of the Postman client and have download and installed it on your system. You can use other API clients of your choice but these steps were taken using the Postman application.
- Log in to Kayako.
- Search for the user in question and open the user profile.
NOTE: Use the search function to look for a user's profile or go to https://domain.kayako.com/agent/users to search from the Users widget. Just change the "domain" with your actual domain name. Or you can search from the Users widget by clicking the icon on the left-hand panel.
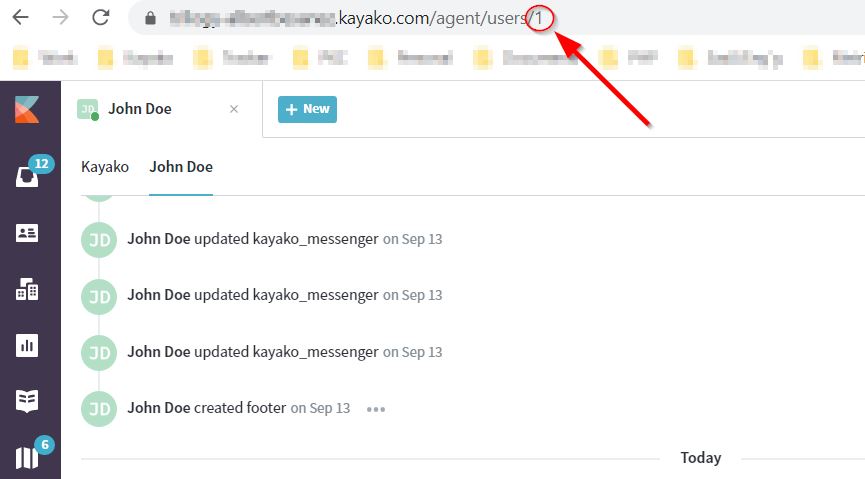
- Once the profile is open, get the user ID from the URL in the address bar as shown in the image below.
NOTE: In the example below, the user ID is the number at the end of the URL which is 1. Repeat this step to gather all the user IDs you want to retrieve information about.
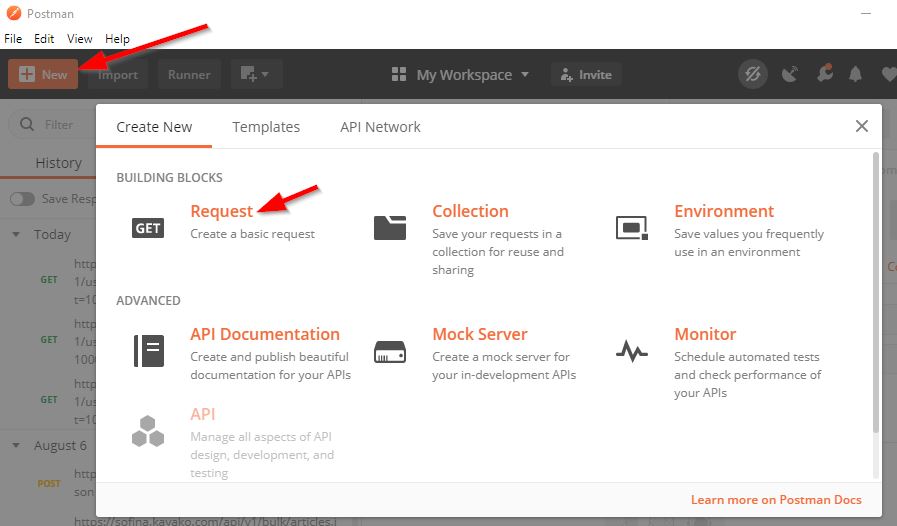
- Once you have the list of user ID/s, open your Postman client.
- Click on New on the upper-left corner and select Request on the pop-up screen.
NOTE: The screen may look slightly different on a Mac computer. The succeeding screenshots were taken from a Windows installation.
-
Select the GET method from the drop-down.
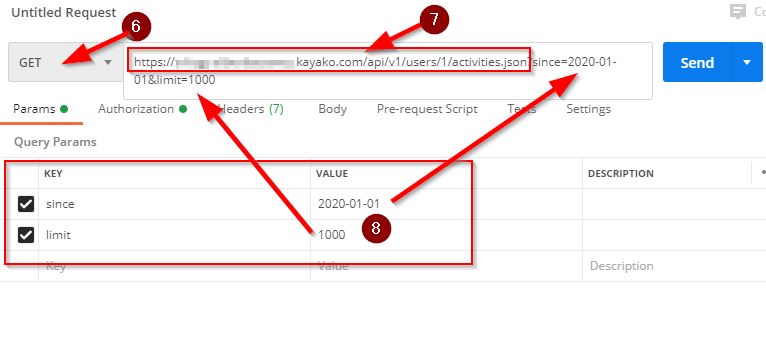
NOTE: Refer to this screenshot for the succeeding steps. - Write the URL using this pattern:
https://DOMAIN.kayako.com/api/v1/users/<User_ID>/activities.json- Replace
<User_ID>with the values you obtained from step #3. - Replace
DOMAINin the above URL with your Kayako domain.
- Replace
-
Click the Params tab and define a 'since' and 'limit' parameters. Set the limit to an appropriate number. You will notice the address is automatically updated as you type the values.
- Since refers to the start date of activities to be retrieved. Date Format should be in Year-Month-Day.
- Limit is the max quantity of returned events.
-
On the Authorization tab, select Basic Auth, and add your Kayako's credentials. (see screenshot below)
- Enter your Kayako email address and password in the Username and Password text fields. (see screenshot below)
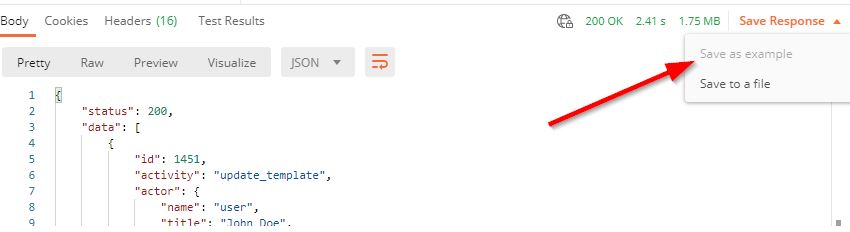
NOTE: If the user account you specified here has two-factor authentication enabled, you need to disable it. - Press Send.

NOTES:
- If you are getting a different error code other then 'status 200', please refer to this response code documentation.
- You have the option to convert this data to a CSV file should you wish to peruse it using tables and graphs. We recommend you save the JSON file then look for a JSON to CSV file converter online. We do not provide support to anything beyond this point.
ATLAS
Comments