Overview
In Kayako, "tickets" are called "conversations." Unlike traditional help desks, Kayako lets your team be proactive and provide ways to communicate with your customers. They can create or start conversations with your customers from the agent area. On the other hand, your customers can also submit tickets or conversations via email, messenger, or social media (Facebook and Twitter). They can also submit conversations through the Help Center's 'Start a conversation' link.
Diagnosis
In Kayako, the support team's interactions with the customers are grouped into conversations. Kayako's conversation format is designed to help you have a more informed, more contextual, and all-around support interactions with your customers.
This is the pipeline where the customer support agents spend most of their time.
Every time a customer reaches out to support with a question, Kayako creates a new conversation, which then captures every bit of customer interaction until their question is resolved. In addition to capturing all communication — whether it happens over email, chat, Twitter, Facebook, etc. — conversations can also include private notes, only visible to the support staff, as well as input from collaborators outside of the support team.
As mentioned, conversations can be created through different channels (email, chat, Twitter, Facebook, etc.). When a user sends an email to your configured email channel, your Kayako Messenger, or to the Twitter or Facebook accounts you integrated with Kayako, the message will automatically be converted into a conversation. Agents can also create or start conversations with your customers from the agent area by clicking the 'New' button.

In this article, we will present the steps in creating conversations through the 'Start a conversation' link in your Help Center.
Please note that you can control how your team can interact with your customers through different channels in different ways. Please check out the solutions we prepared from the KB articles below:
- Disabling the Help Center Ticket Submission Form
- Restricting Messenger Display on Help Center
- Adding Twitter Accounts to Kayako
- Connecting Your Facebook Social Media Account with Kayako
- Adding Email Addresses to Work with Kayako
Solution
To start a conversation through the Help Center:
-
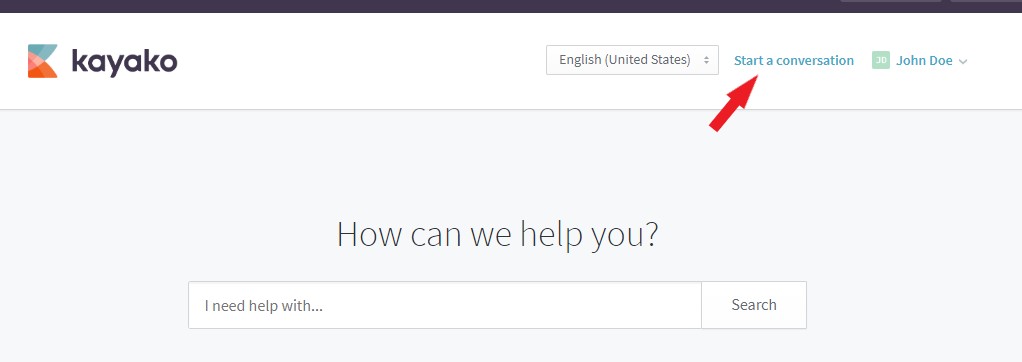
In the Help Center, click the 'Start a conversation' link.
-
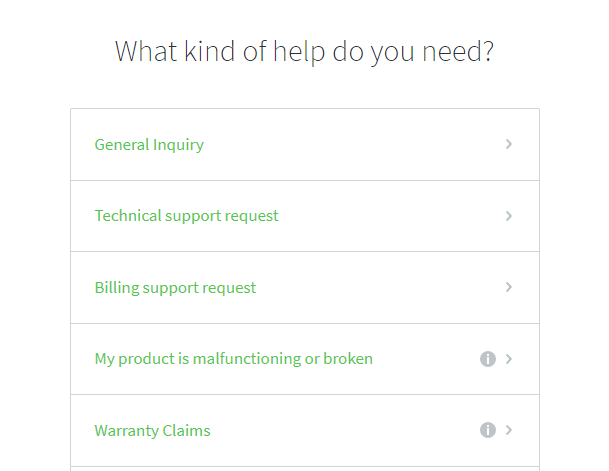
If you created multiple forms, it will be presented to users where they can select the form from the options based on what type of help they need.
-
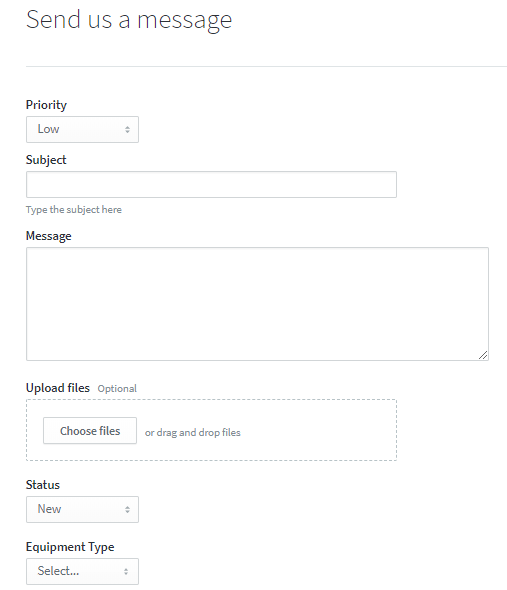
Type or enter the information on their respective fields.
NOTES:
-
The custom fields can be controlled and managed. If you wish to add more fields, visit the Adding Custom Fields for Conversations article.
-
If a user wants to include an image or screenshot to the ticket or conversation, their only option is to use the "upload files" field. Pasting the image using CTRL + V does not work here.
-
If the user has not signed in yet or does not have an existing account, they will be required to enter an email address.
-
-
Click Send to submit the conversation.
Confirmation
Once the conversation is submitted, staff (agents and admins) can view this in the agent area where they can reply to customers' inquiries and concerns.
Conversations can be assigned automatically through automation using triggers and monitors.
ATLAS
Comments