Overview
The messenger chat icon is displayed on the lower-right corner of the screen with the default bubble launcher icon. Some users might want to use a different image instead of the default icon. Moreover, one might need to change other aspects of the icon such as its size.

Solution
If one wants to make the messenger widget unique or match a product and brand, one can always customize the icon. This would involve hiding the existing messenger icon and creating a custom one.
Below are the steps to make messenger work with the custom icon are as follows:
-
Log in to your Kayako Help Center with your admin credentials.
-
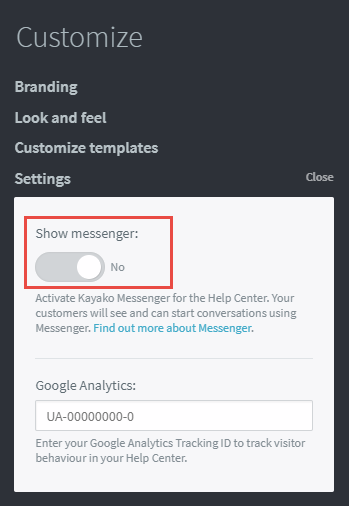
Disable the default messenger in the Help Center and refresh the page (Customize > Settings > Show messenger > No)
-
Embed the messenger code at the bottom of the footer template. (Customize > Customize templates > Footer)
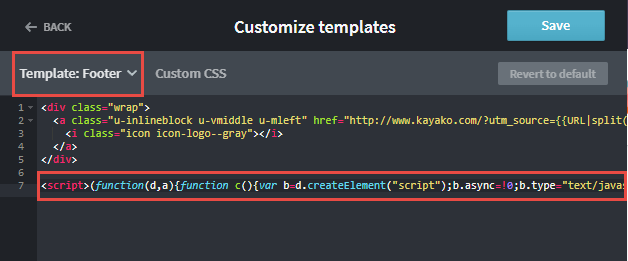
(You can get the messenger code from within your Kayako Administration > Messenger > Configure > go through the customization process and on Step 5. Embed code you will get the snippet you can use in your help center and on your website.)
-
Add the following code under the messenger snippet in the footer template - it hides the default icon and makes it pop up when you call toggleMessenger function:
<script>
For more information on the options available for messenger, please refer to our developer documentation on creating a custom launcher at the Kayako Developer site.
kayako.config = {
hideLauncher: true
}
kayako.ready(function () { }) </script>
<script> function toggleMessenger (e) { if (kayako.visibility() === 'minimized') { kayako.maximize() } else { kayako.minimize() } } </script> -
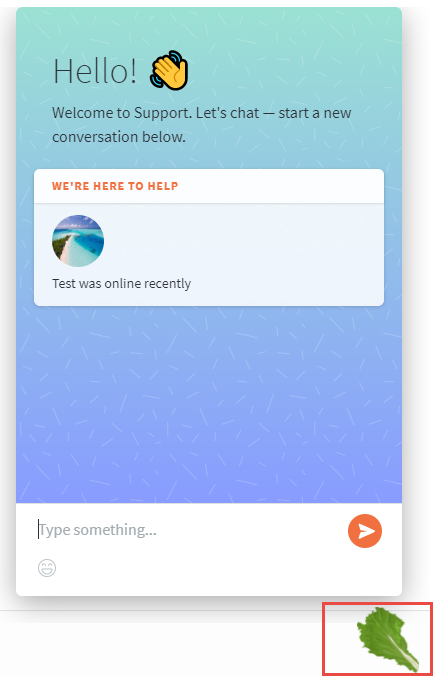
Paste the custom button code into the footer template. In the example below, we are using a lettuce image for a mock site
https://lettuce-experts.kayako.com<a href='' onclick="toggleMessenger(event)">
<img class="kmess" src='https://i.imgur.com/FJEgklH.png' />
</a>Please note you will need to replace the image source with your chat button image link.
-
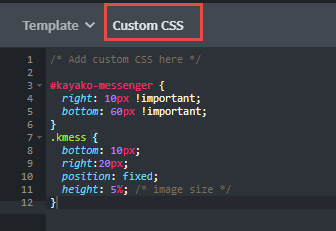
Add the custom styles that will put the button and messenger itself in place into the Custom CSS tab of the Customize menu:
Messenger placement:
#kayako-messenger {
right: 10px !important;
bottom: 60px !important;
}
Button placement and size:
.kmess {
  bottom: 10px;
  right:20px;
  position: fixed;
  height: 5%; /* image size can also use width*/
}
That is it! You can now customize the messenger the way that suits you best.
Testing
Once the changes are saved, one can visit their help center to confirm the icon is now using the new image and styling.
ATLAS
Comments