Overview
If you would like to be reminded about a particular case, or perhaps you must follow up by a certain date, or you just like to keep track of your conversations, you can implement this in Kayako. This article shares the solution for adding a monitor that will automatically send reminders for conversation follow-ups.
Diagnosis
There's a saying, "Don't trust your memory, write it down!" This saying simply tells us that even if you have a sharp memory, some important appointments or tasks could slip away if you have tons of things remember.
In Kayako, you don't need to write things down because you can create an automation that will send you a reminder. To avoid losing your customer's trust in the business for missing a follow-up to their issues or concerns, an automated reminder can help you remember things and stay on top of your commitments.
Kayako lets you create a custom 'date' field where you get a pop-up calendar that users can select a date from. This calendar can be used to indicate a follow-up date, then a monitor can be configured to send a notification email to the case or conversation owner with a reminder message to do a follow-up on the conversation.
Prerequisite
- To add custom fields in Kayako, you will need an administrator account with 'Manage conversation fields' permission.
- To add a monitor in Kayako, you will need an administrator account with 'Manage automations' permission.
Solution
There are three (3) parts involved in this solution. The first one is to add a custom field, next is to add a new monitor, and the final step is for agents to add a reminder on the conversation.
A. Adding a Custom Field
To learn more about adding custom fields, please visit the Adding Custom Fields article.
- Sign in to Kayako and go to the admin area.
-
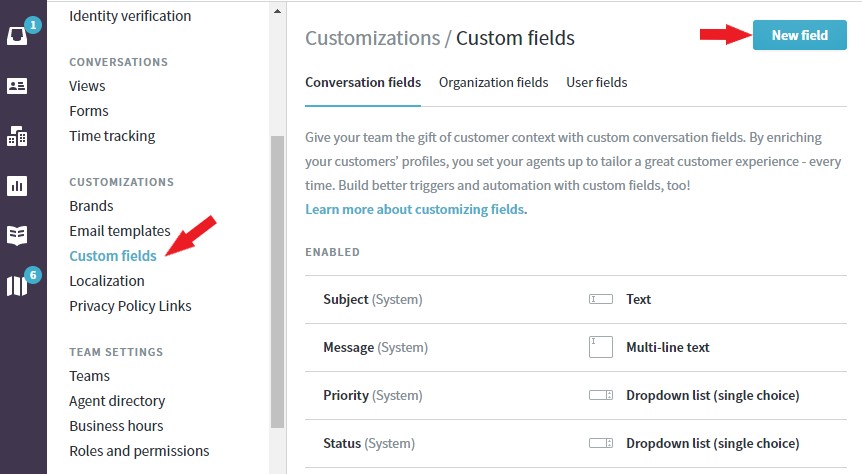
Click Custom Fields under CUSTOMIZATIONS.
-
Here, you'll see a list of system and custom fields that have been created already. Click the New field button.
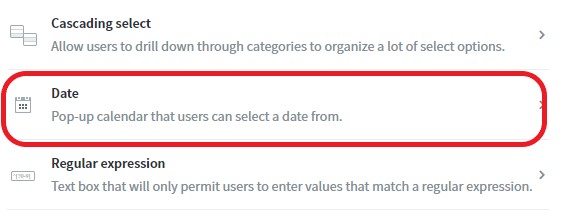
-
Choose 'Date' as the type of the field from the list.
-
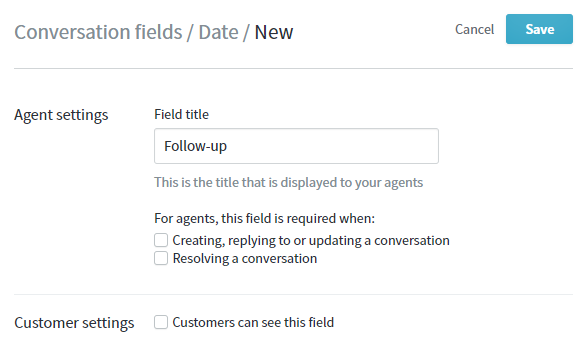
In the Field title text box, enter the title, 'Follow-up.'
-
Save changes.
- Finally, to make sure the new custom field appears in your conversation properties, you need to add it to your forms. (check out step 10 in the KB)
NOTE: This custom field is for agents' used only so you need to leave the 'Customers can see this field' unchecked.
B. Adding a New Monitor
After adding the custom field, you need to add a new monitor to complete the process. To learn more about adding monitors, please visit the Creating Automations with Triggers and Monitors article.
-
Sign in to your Kayako and go to the admin area.
-
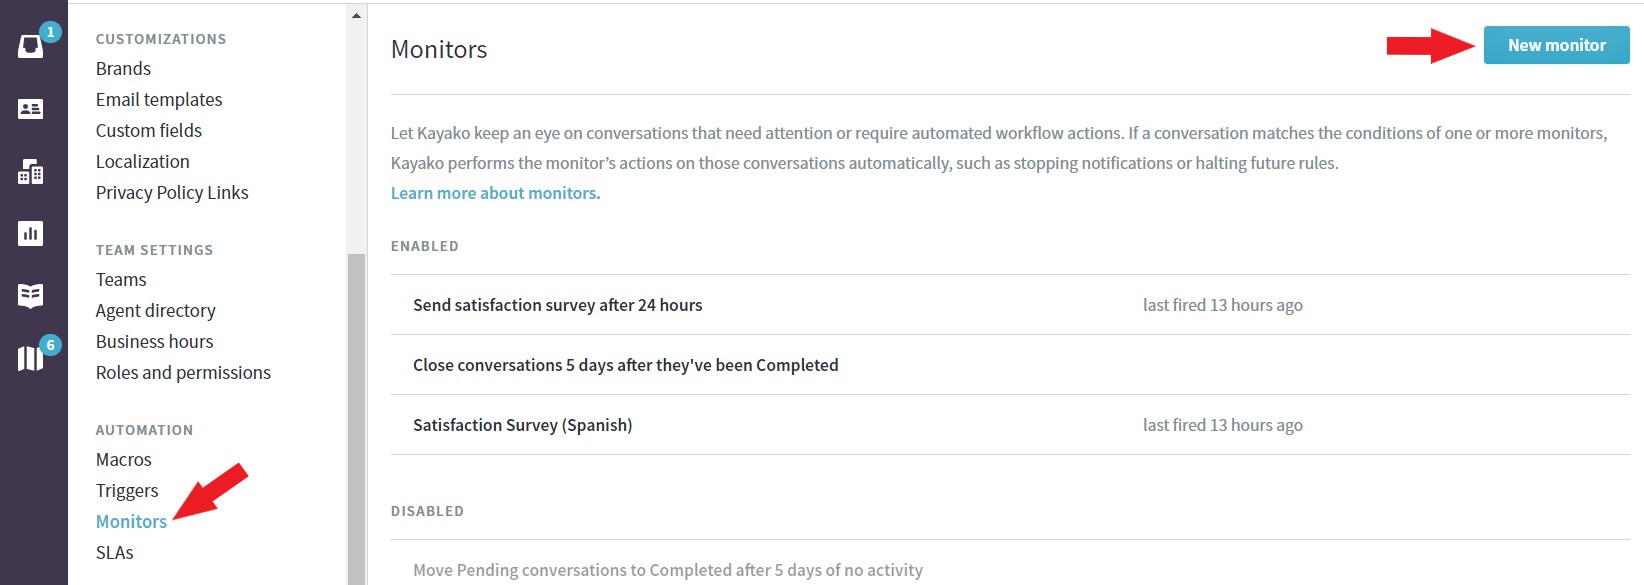
In the sidebar, click on Monitors to see a list of any monitors that have been created in your Kayako.
-
Click the New monitor button.
-
In the Rule Title field, add a descriptive title. In this case, let's say a Reminder for Conversation Follow-ups.
NOTE: It's essential to use a good naming convention so you can keep track as you add more and more automations. -
In the 'When these conditions are met' section, from the Select a condition dropdown, choose Conversation: Follow-up.
- From the next dropdown, select before or on.
- From the next dropdown, select Today.
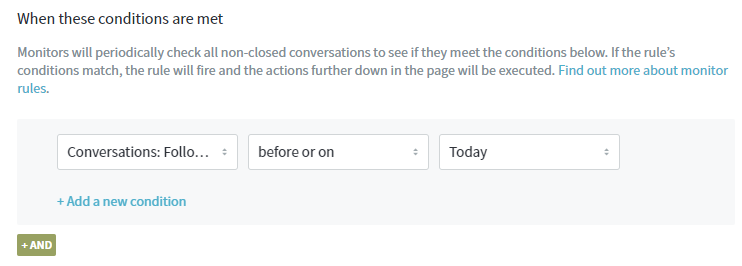
-
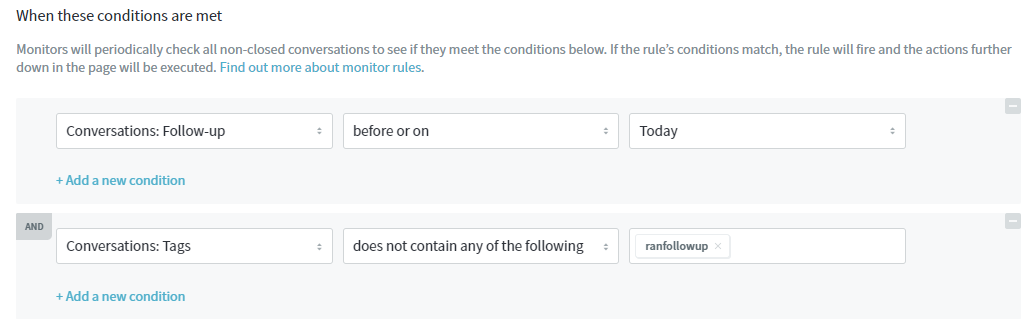
Click the +AND button to add an AND condition.
-
From the Select a condition dropdown, choose Conversation: Tags.
- From the next dropdown, select does not contain any of the following.
- From the next blank field, type
ranfollowup.
-
In the 'Perform the following actions' section, from the Select an action dropdown, choose Notification: Email a user.
- From the Select receiver dropdown, choose (Assignee).
- In the Subject and Message fields, add the content for your reminder email. The message content in your notification email can be customized using placeholders to include but not limited to the assignee name, case ID, case URL, and a preview of the message.
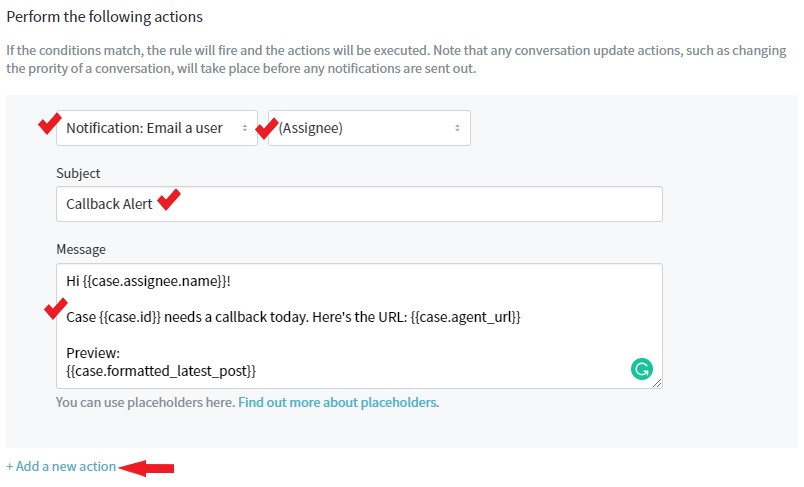
-
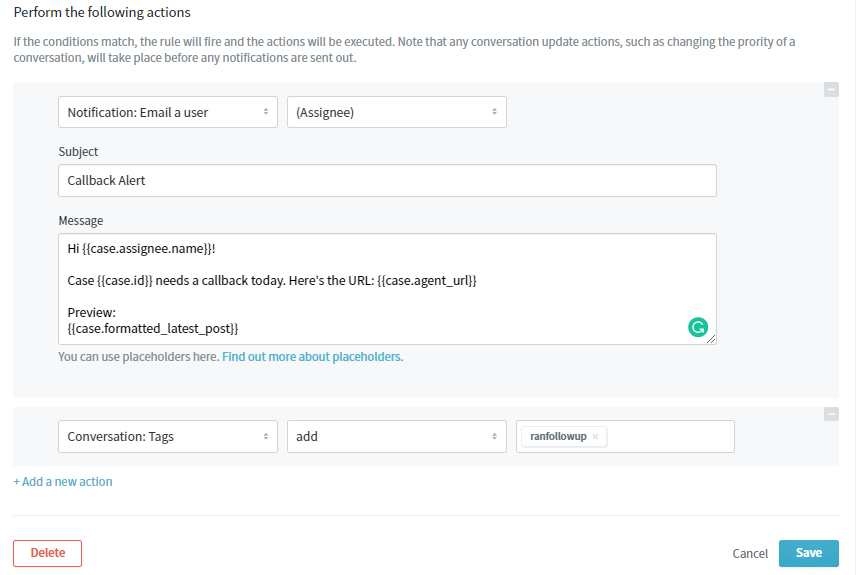
Click the +Add new action link.
-
From the Select an action dropdown, choose Conversation: Tags.
- From the Select an operator dropdown, choose Add.
- From the next blank field, type
ranfollowup.
-
Click the Save button to create your new monitor.
IMPORTANT NOTE: Steps A and B above needs to be configured once only. When you're all set and done configuring both, then all you need to do is to add the reminder in every conversation that needs follow-up (see step C below).
C. Adding a Reminder in Your Conversations
-
Go to the agent area and open a conversation.
-
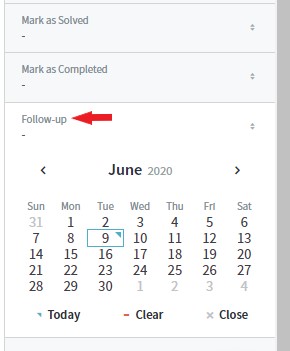
On the conversation properties (right-hand panel), click the Follow-up field to open the pop-up calendar.
-
Select a date on when you want to make a follow-up to this conversation.
- Click Update properties at the bottom.
Confirmation
Your monitor will run once per hour and check all of your non-completed conversations for matches. Once a user has added a reminder date in their conversation, this will be captured by the monitor and will send out the reminder email to the assignee.
Note: If a conversation is in closed status, this solution will not work as there is no option to change the conversation properties of a closed conversation.
ATLAS
Comments