Overview
Kayako is designed to help you empower your team and streamline your support processes, and few features do as much to make that happen as the automation engine. For all that variety, Kayako handles all of those different tasks with just two automation structures: monitors and triggers.
Diagnosis
If you want to set up Kayako to automatically send notification and reminder emails, escalate a conversation that has breached its SLA, or you want to manage when your satisfaction surveys go out, which agents are assigned to which conversations, or how your communications move through your support workflow, then automation through triggers and monitors come into play.
Check out our introduction to automation, for more information on what you can build with automation.
Understanding the Difference Between Triggers and Monitors
Both triggers and monitors are put together in roughly the same way:
- First, define a set of criteria by selecting one or more conditions. These direct Kayako to check your conversations for any that match those criteria.
- Next, specify what action Kayako should take for matching conversations. Each action specifies a particular conversation update, notification, etc.
Depending on your needs, triggers and monitors can be super-simple or incredibly complex.
- You can use multiple groups of conditions to narrow their influence to a narrow subset of conversations.
- You can build automation to perform a single action or set a whole laundry list of updates and notifications to execute on any matching conversation.
- You can use different conditions and actions available when building automations.
While triggers and monitors are assembled in much the same way, they differ in when and how they are executed.
- Triggers are event-based. They perform actions on any conversations that match their criteria, the minute those conversations are created or updated. Based on the conditions you select, you can specify the types of updates that should cause the trigger to run.
-
Monitors are time-based. When building monitors, you can select a time-based condition; like how long the conversation has before it breaches an SLA target; plus any additional conditions to narrow your subset of conversations. The monitors then sweep your support queue in hourly intervals. Then Kayako performs whatever actions you define on any conversations that match.
NOTES:
-
There is no way to configure Monitors' rules to run at a specific time. They are executed every hour through server crons and we don't have control over its execution time.
- There is a current limitation on the number of conversations that a monitor can act on in a single run. Monitor can process a maximum of 1000 cases in a single run.
-
Prerequisite
- To add or edit triggers and monitors in Kayako, you need an administrator account with the Manage automations permission.
Solution
Adding a New Trigger
The particular steps of building a trigger depend on what you want that trigger to do, but we're going to look at an example of a right starter trigger.
Let's say you want to set up a trigger to escalate any conversations as soon as they breach their SLA targets. We want the escalated conversations bumped up to Urgent priority and tag them with 'breached,' so we can set up a view to display all our breached conversations.
NOTE: To learn more about the different conditions and actions available when building automations, please visit the Building Automation Conditions article.
-
Sign in to your Kayako and go to the admin area.
-
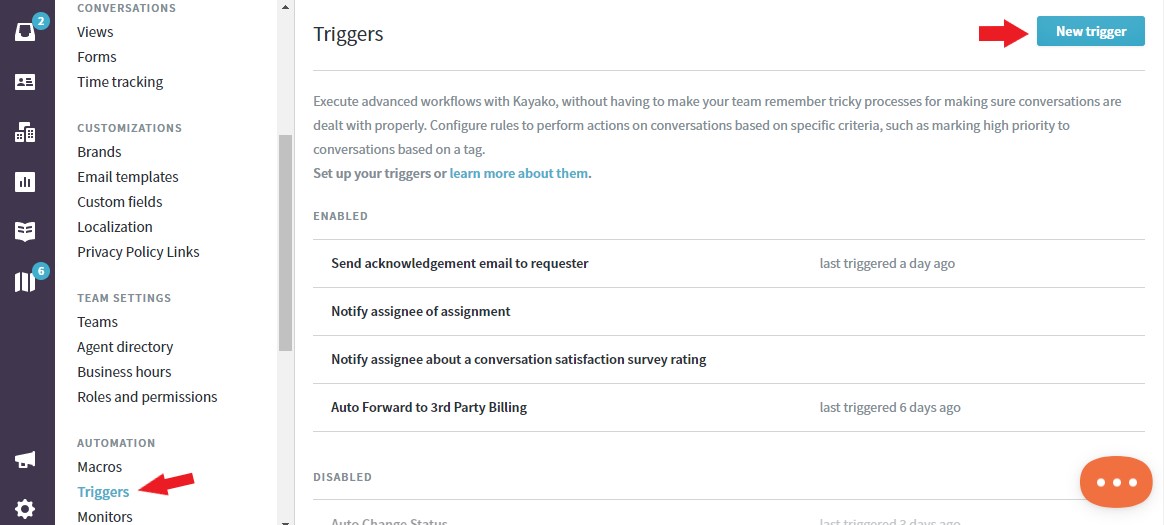
In the sidebar, click Triggers to see the list of any triggers that have been created in your Kayako.
-
Click the New trigger button.
-
In the Rule Title field, add a descriptive title. In this exercise, let's say SLA escalation.
NOTE: It's essential to use a good naming convention so you can keep track as you add more and more automations. -
In the Rule Settings section, we're going to leave Any selected, since we want it to apply to conversation updates from any source.

-
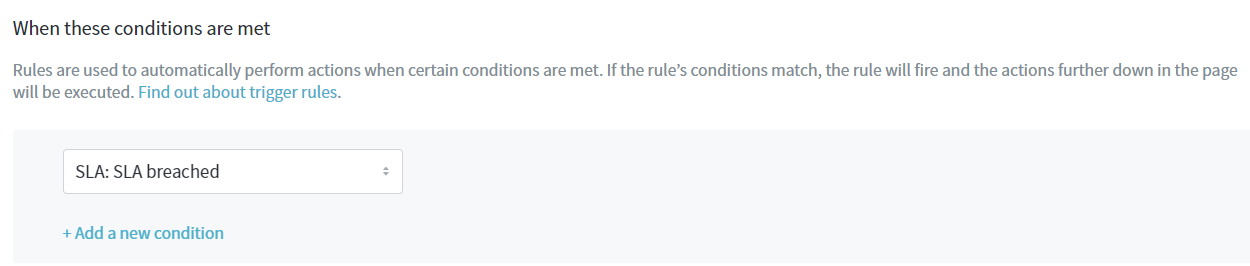
In the 'When these conditions are met' section, from the Select a condition dropdown, choose SLA breached.
-
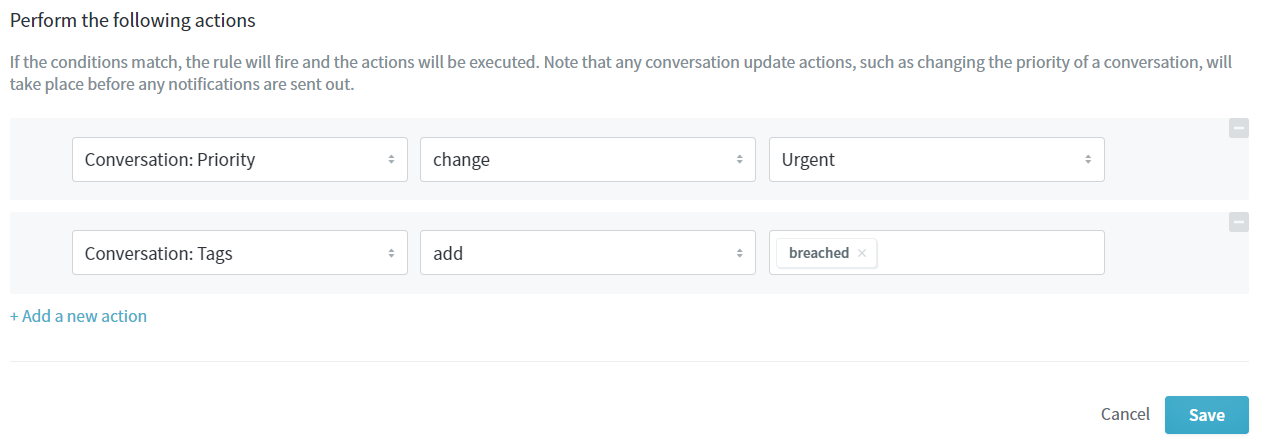
In the 'Perform the following actions' section, from the 'Select an action' dropdown, select Conversation: Priority.
- From the next dropdown, choose Change.
- From the last dropdown, choose Urgent.
-
Click the +Add a new action link.
-
From the Select an action dropdown, choose Conversation: Tags.
- From the next dropdown, choose Add.
- In the last field, type
breachedand add a space to add it as a new tag.
-
Click the Save button to create your new trigger.
Adding a New Monitor
Monitors can serve many different purposes, but a commonplace to start is to build monitors to keep an eye on your SLA targets. Let's look at an example monitor that sends your agents an email whenever a conversation they're assigned to is within 2 hours of breaching its next SLA target.
NOTE: To learn more about the different conditions and actions available when building automations, please visit the Building Automation Conditions article.
-
Sign in to your Kayako and go to the admin area.
-
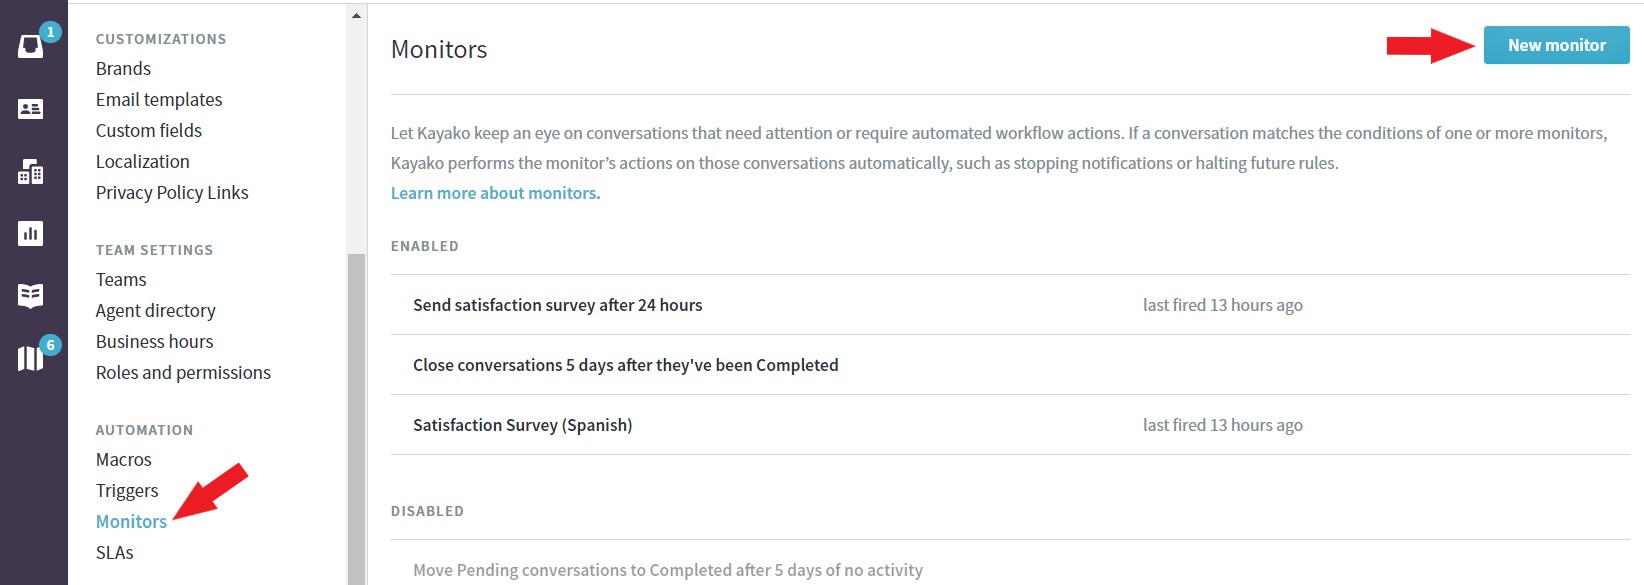
In the sidebar, click on Monitors to see a list of any monitors that have been created in your Kayako.
-
Click the New monitor button.
-
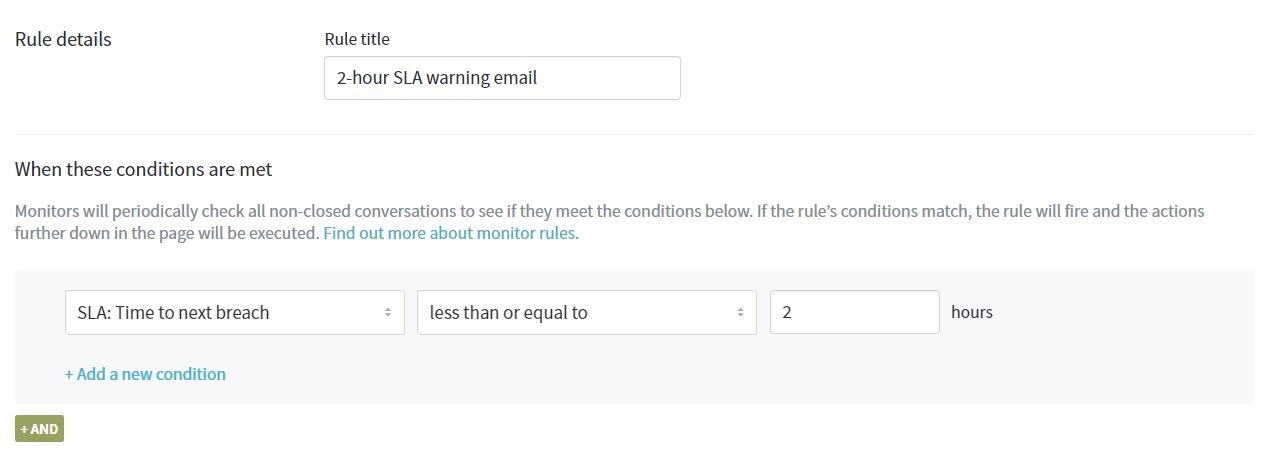
In the Rule Title field, add a descriptive title.
In this exercise, let's say a 2-hour SLA warning email.
NOTE: It's essential to use a good naming convention so you can keep track as you add more and more automations. -
In the 'When these conditions are met' section, from the Select a condition dropdown, choose SLA: Time to next breach.
- From the next dropdown, select less than or equal to.
- In the Hours field, enter
2.
-
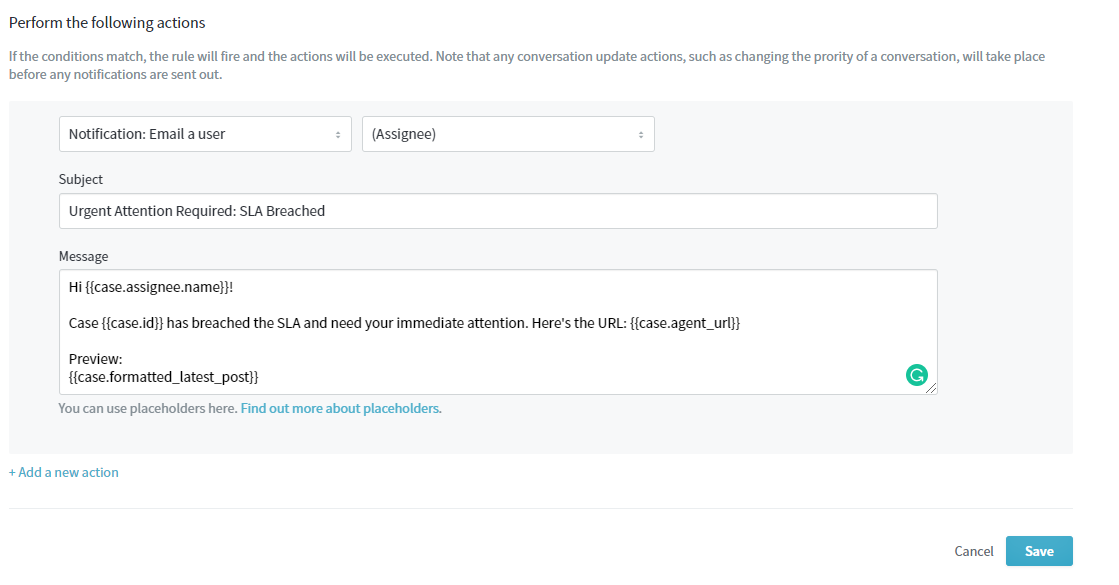
In the 'Perform the following actions' section, from the Select an action dropdown, choose Email a user.
- From the Select receiver dropdown, choose (Assignee).
- In the Subject and Message fields, add the content for your reminder email. The message content in your notification email can be customized using placeholders to include but not limited to the assignee name, case ID, case URL, and a preview of the message.
-
Click the Save button to create your new monitor.
Confirmation
Trigger
The trigger will fire once conditions are met. In the example given above, every time a conversation has breached its SLA, the trigger will bump up its priority to Urgent and will add the tag 'breached' to it automatically.
Monitor
Your monitor should run once per hour and check all of your non-completed conversations for matches. In the example above, whenever a conversation an agent is assigned to is within 2 hours of breaching its next SLA target, the monitor will automatically send a notification email.
ATLAS
Comments