Overview
By default, any email that Kayako sends (notifications, replies, etc.) has a branded footer at the bottom. This article provides the steps to change this text to match your needs.
Diagnosis
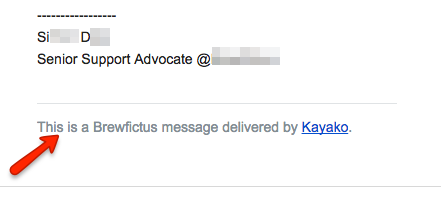
The email footer that appears in every email you send out through Kayako is a branded footer that looks like the screenshot below:

This footer appears by default on conversation replies, notifications sent by triggers or monitors, as well as the forgot password, and satisfaction survey emails. You can remove or change this footer from the admin area.
Prerequisite
- To edit the email templates in Kayako, you will need an administrator account. No specific permission is required.
- A working knowledge of the HTML language.
Solution
- Sign in to Kayako and go to the admin panel.
- Click Email templates under CUSTOMIZATIONS.
- NOTE: If you are supporting multiple brands, select the corresponding brand in the Brand drop-down menu.

- NOTE: If you are supporting multiple brands, select the corresponding brand in the Brand drop-down menu.
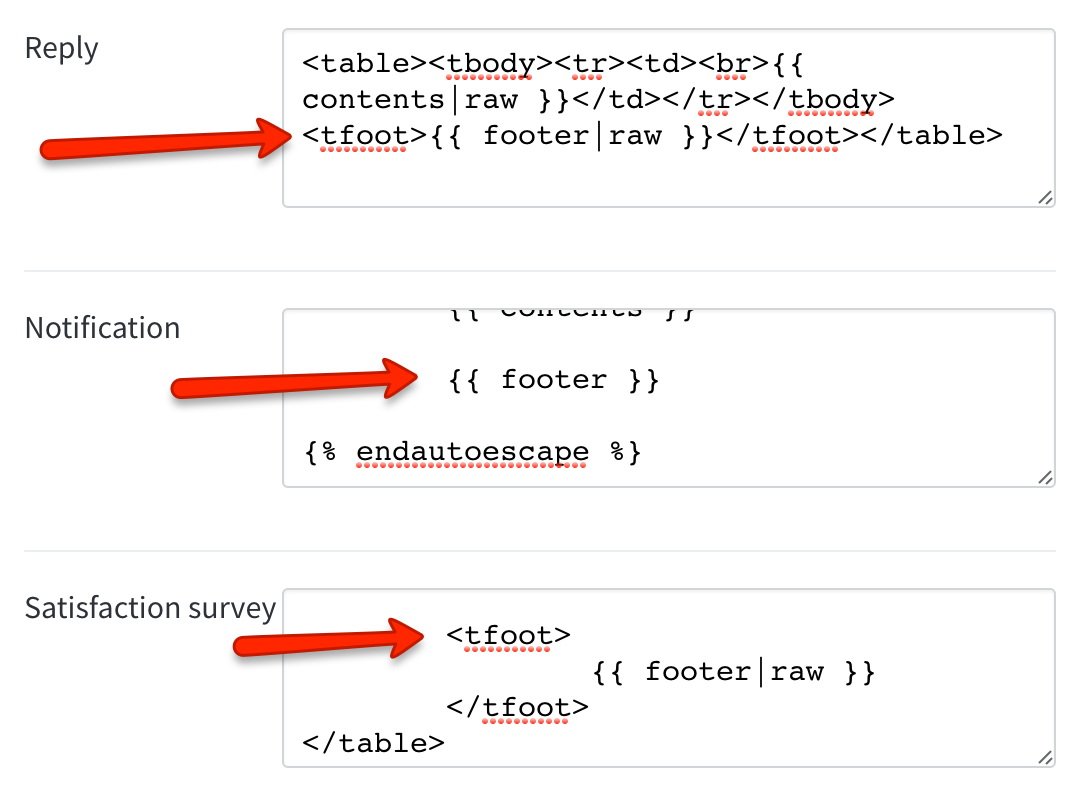
- Go to the template you want to edit (e.g., the Reply template), and delete either the
{{ footer }}or the<tfoot>{{ footer|raw }}</tfoot>tag.
- Click Save to save the changes.
Alternatively, you can add your own custom footer:
- For the 'Reply' or 'Satisfaction survey' template – remove the
{{ footer|raw }}tag and replace it with your own footer message in HTML between the<tfoot>and</tfoot>tags. - For the 'Notification' template – remove the
{{ footer }}tag, drop down below the{% endautoescape %}tag, and add a<tfoot>and</tfoot>tag, and create your own footer message in HTML between them.
Confirmation
If you remove the footer, your conversation replies, notifications, forgot password, and satisfaction survey emails will no longer show the branded footer.
If you added your own customized footer, then the customized footer will show in place of the default Kayako branded footer in your conversation replies, notifications, forgot password, and satisfaction survey emails

ATLAS
Comments