Overview
Let us say you manage support at a relatively small company and you have tasked one of your agents with handling the support requests that come in via Twitter. You can use a trigger to take any new conversation that comes in via Twitter and assign it directly to your social support staffer.
Diagnosis
When it comes to streamlining your support processes, conversation assignments are often a good place to find some quick solutions. Between reviewing the queue, assessing individual conversations, and selecting appropriate assignments, your entire team can end up sinking a ton of time into the process. But with Kayako's automation tools, you can instantly route certain conversations to certain agents or teams. That means less time spent deliberating and more time spent solving problems for your customers.
In Kayako, you can create a trigger that auto-assigns conversations created from a specific channel (e.g., Twitter or Facebook, messenger, etc.) to a specific team or agent.
NOTE: To learn more about the different conditions and actions available when building automations, please visit the Building Automation Conditions article.
Prerequisite
- To add a trigger in Kayako, you need an administrator account with the 'Manage automations' permission.
Solution
-
Sign in to your Kayako and go to the admin area.
-
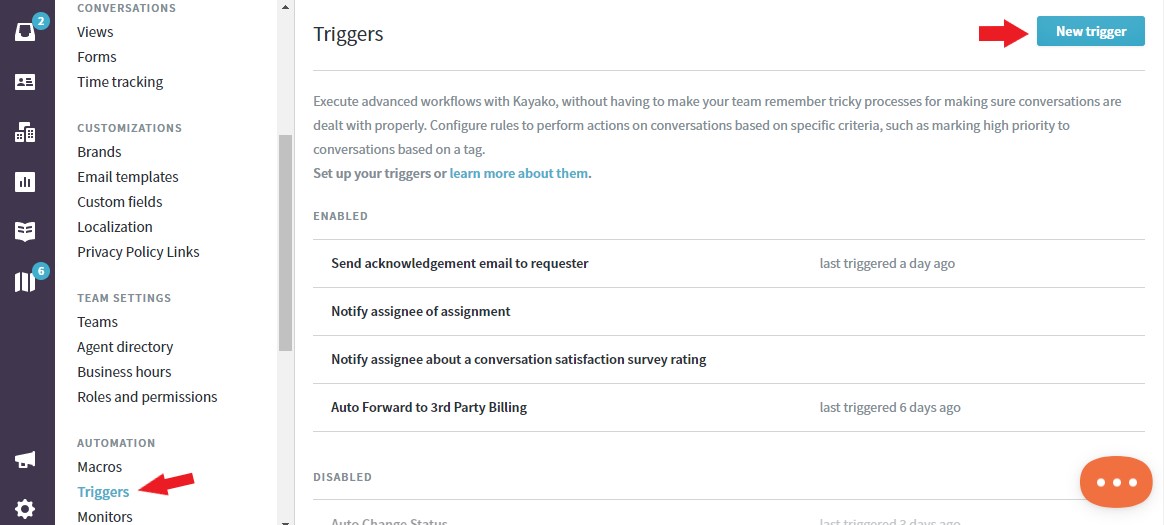
In the sidebar, click Triggers to see the list of any triggers that have been created in your Kayako.
-
Click the New trigger button.
-
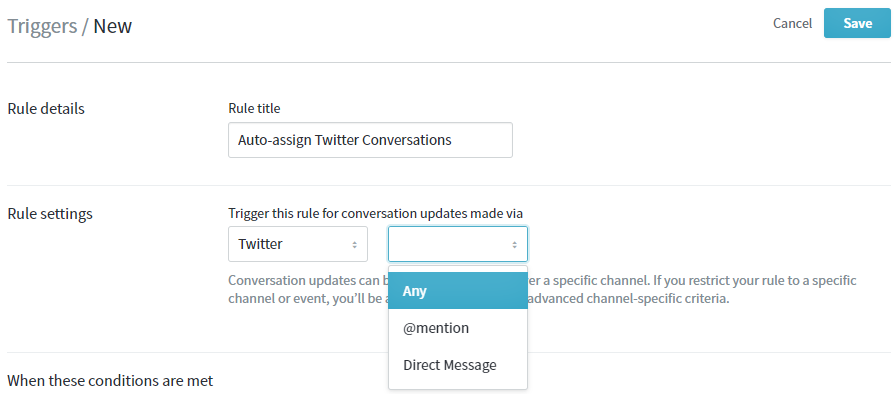
In the Rule Title field, add a descriptive title. In this exercise, let's say Auto-assign Twitter Conversations.
NOTE: It's essential to use a good naming convention so you can keep track as you add more and more automations. -
In the Rule Settings section, select the source channel. In this exercise, we are selecting Twitter (or select whichever channel you want this trigger to be applied to).
-
In the next drop-down menu, we will select Any which means it will be applied to both '@mentions' or Direct messages.
-
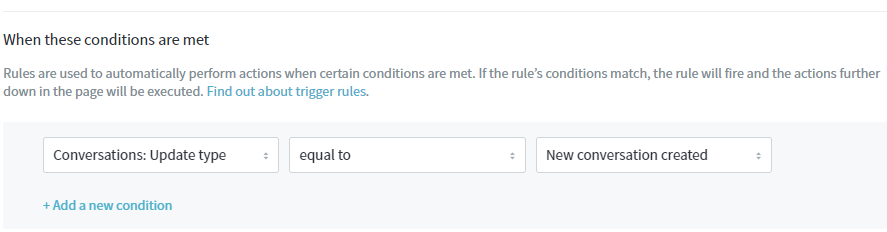
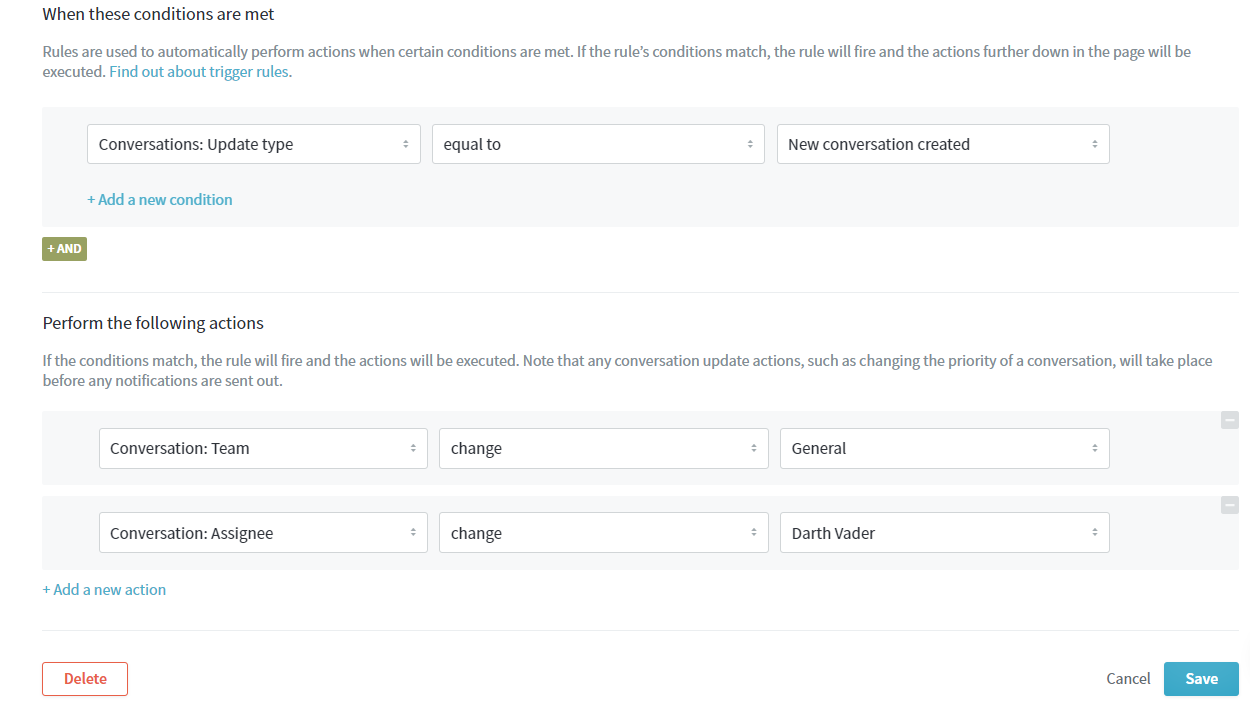
In the 'When these conditions are met' section, from the 'Select a condition' dropdown, choose 'Conversations: Update type'.
- From the next dropdown, choose equal to.
- From the last dropdown, choose New conversation created.
-
In the 'Perform the following actions' section, from the 'Select an action' dropdown, select Conversation: Team.
- From the next dropdown, choose change.
- From the last dropdown, choose the '[name of the team where the support agent belongs]'.

- NOTE: This step is important! You need to allow the trigger to assign it to the team where the agent belongs first before you can assign it to an agent (see the next step).
-
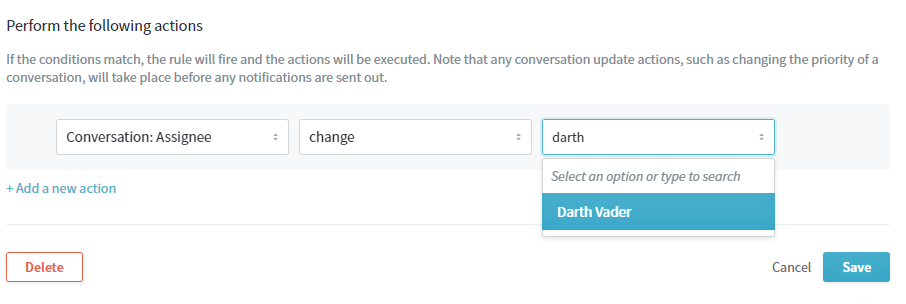
Click the '+Add a new action' link. In the 'Perform the following actions' section, from the 'Select an action' dropdown, select Conversation: Assignee.
- From the next dropdown, choose change.
- From the last dropdown, choose the '[name of your social support agent]'.
- TIP: Type the first three letters of the name and the auto-suggest box will appear.
- TIP: Type the first three letters of the name and the auto-suggest box will appear.
-
Click the Save button to create your new trigger.
NOTE: The final conditions should look like the one in the image below:
Confirmation
Every time your customer sends you a direct message via your Twitter account or '@mentions' your handle on Twitter, the conversation created out of those messages will be assigned to the agent you specified in the trigger automatically.
You can follow this same concept if you want to auto-assign conversations from other channels such as email, messenger, or the Help Center to a specific team or agent.
ATLAS
Comments