Overview
You can create a trigger that sends an email notification to a team member that a conversation was just assigned to them. You can use placeholders to customize the message content in your notification email such as to include but not limited to the assignee name, case ID, case URL, and a preview of the message.
Diagnosis
To save time and keep your service experience personal, Kayako lets you use placeholders to add dynamic content to your notification emails automatically. This saves precious time that would otherwise be spent manually retrieving unique customer information for every response. When used correctly, placeholders can customize even the most common support messages and processes.
When a new conversation has arrived, automation can be configured to assign it to a specific team or agent. The assignee can be notified through an automated email using a trigger rule. The message content in your notification email can be customized using placeholders to include but not limited to the assignee name, case ID, case URL, and a preview of the message.
You can further customize the email by referencing the placeholders' table in this article.
Prerequisite
- To create a trigger in Kayako, you will need an administrator account with the 'Manage automations' permission.
Solution
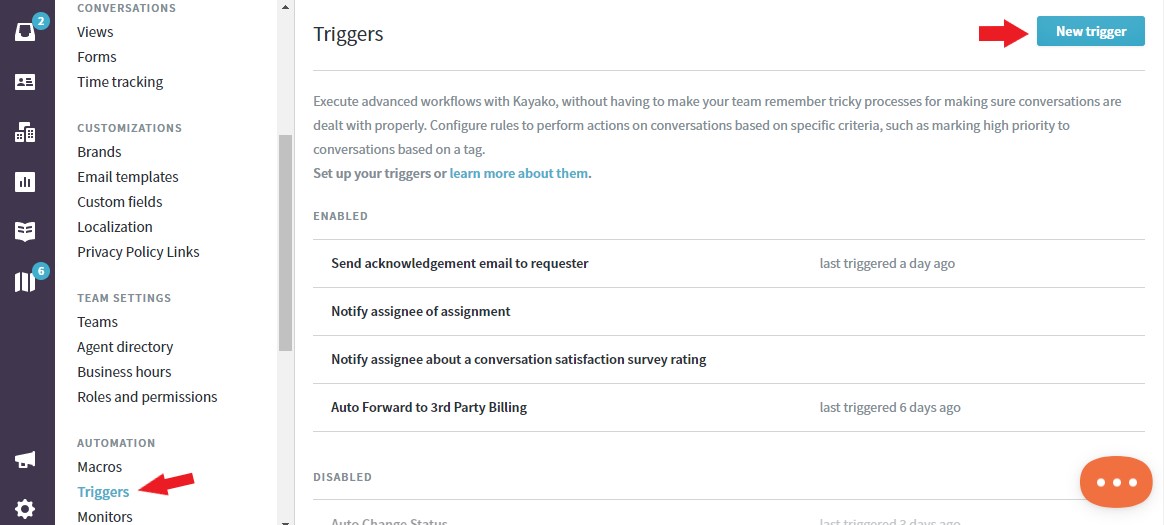
- Log into your Kayako and go to the admin panel.
- Click Triggers under AUTOMATION.
- Click on the New trigger button.
- In the Rule Title field, add a descriptive title.
Note: It is essential to use a good naming convention to keep track of triggers.
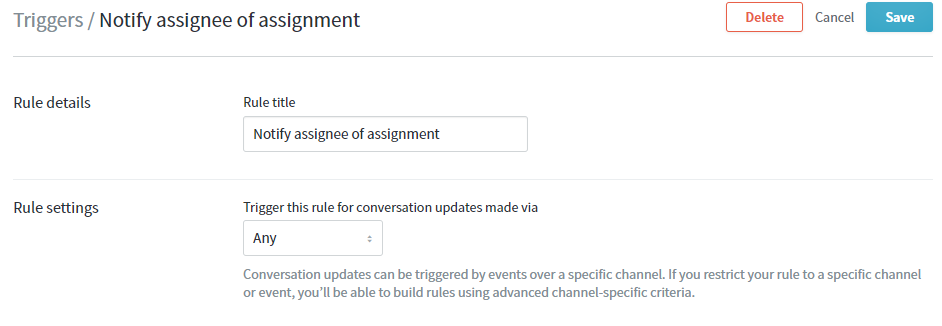
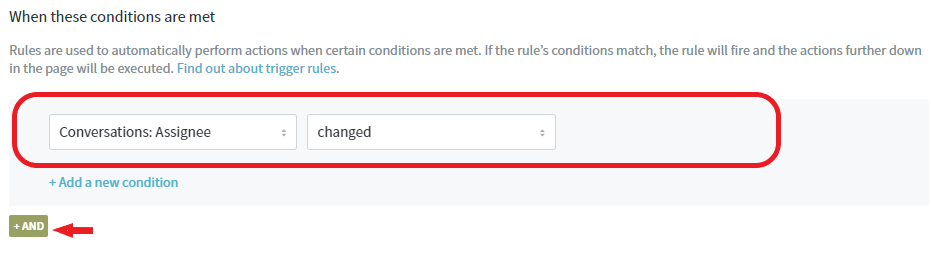
- In the 'When these conditions are met' section, configure the following:
-
From the 'Select a condition' drop-down field, choose Conversations: Assignee.
-
From the next drop-down field, select changed.
-
-
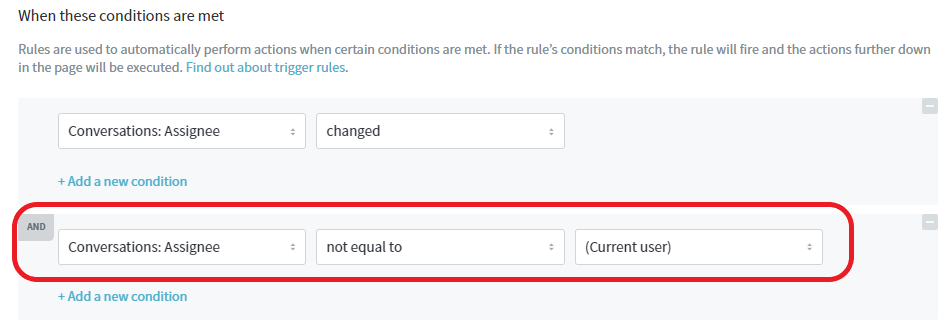
Click the +AND condition and configure the additional condition below:
-
From the 'Select a condition' drop-down, choose Conversations: Assignee.
-
From the next drop-down field, select not equal to.
- From the next drop-down field, select (Current user).
-
- From the 'Perform the following actions' section,
- Select Notification: Email a user, and select (Assignee) in the next drop-down field.
- Enter the Subject and the Message in their respective fields using placeholders. (see sample message below)
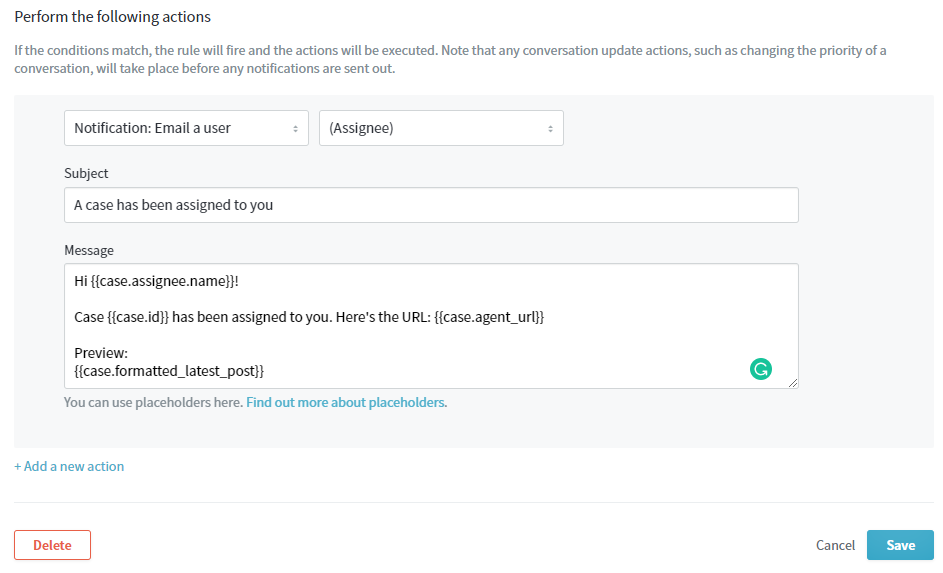
- Click the Save button to create the trigger.
----------------------------
Sample message:
Hi{{case.assignee.name}}!
Case{{case.id}}has been assigned to you. Here's the URL:{{case.agent_url}}
Preview:{{case.formatted_latest_post}}
Confirmation
Every time a conversation is assigned to an agent based on the conditions set in the trigger, that agent will receive a notification email with his/her name on it, the case ID, the case URL, and a preview of the message.
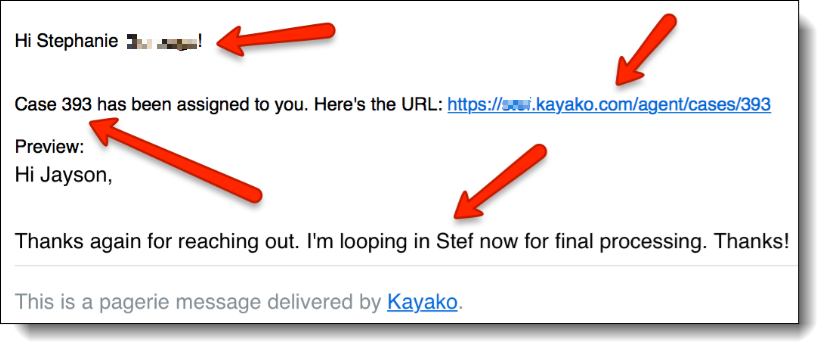
NOTE: The arrows point to the content referenced by the placeholders we used in the sample above.
ATLAS
Comments